If you set out to get root rights for your device, then you probably know why this is needed. You can read about all sorts of advantages, disadvantages, as well as the basic principles of this process. Here we will describe specific examples of unlocking for greater clarity.
Types of unlocks and types of programs
Since there are a lot of programs from different developers that allow you to become a superuser for your OS, both the process and the final result of what we will do are different. For example, there can be three types of root: complete, in which nothing will stop you from making amendments to the system files; shell, which will allow you to make any changes except editing system folder; partial, or temporary, which will “fly off” after a reboot and is less reliable. Utilities that make it easy to get root are also divided into several categories. Some of them require installation and connection to a computer, while others make do with the power of the device being flashed. You can download both of them without any problems from a web site that specializes in unlocking mobile devices. You can also search by name in other places:
- Root Genius;
- Root Master;
- Romaster SU;
- z4root;
- Root Wizard and many others.
How to get superuser rights: example
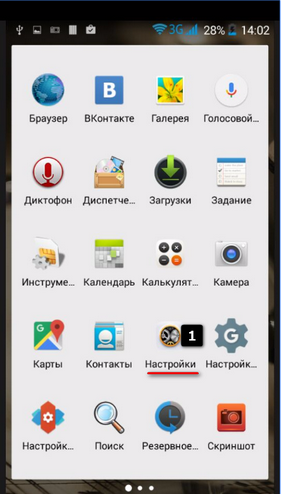
It should be remembered that every day worldwide network they are releasing more and more advanced versions software, create new utilities and refine their functions. Therefore, before performing rooting, it is worth checking the current status of the problem. It is quite possible that you will not have to perform any complex manipulations with the software - now you can already gain access to the “admin panel” in a few clicks. Let's take an example of how to unlock an average smartphone. You can easily find the model of your Android mobile phone in the “Settings” menu, “About” section. So, we need:
- any computer or laptop with Windows OS from XP to version 8.1;
- fully charged smartphone, maximum battery capacity is 50%;
- wire with USB connectors(in PC) and MicroUSB (in smartphone);
- drivers for the device of the specified model installed on the PC (we find it on the manufacturer’s website or on the disk that came with the kit);
- a flashing program called ODIN 3.07 (or higher version);
- utility for obtaining root rights (different for each model).
Unlocking your smartphone
When all the tools are ready and available, we follow the indicated sequence of actions:
- go to the boot menu of the phone. To do this, simultaneously press the “Volume Down” + “Central” + “On\Off” buttons. A loading message and warning appears;
- read carefully and press the “Volume UP” button to continue;
- connect the smartphone to the PC, wait for the process to complete;
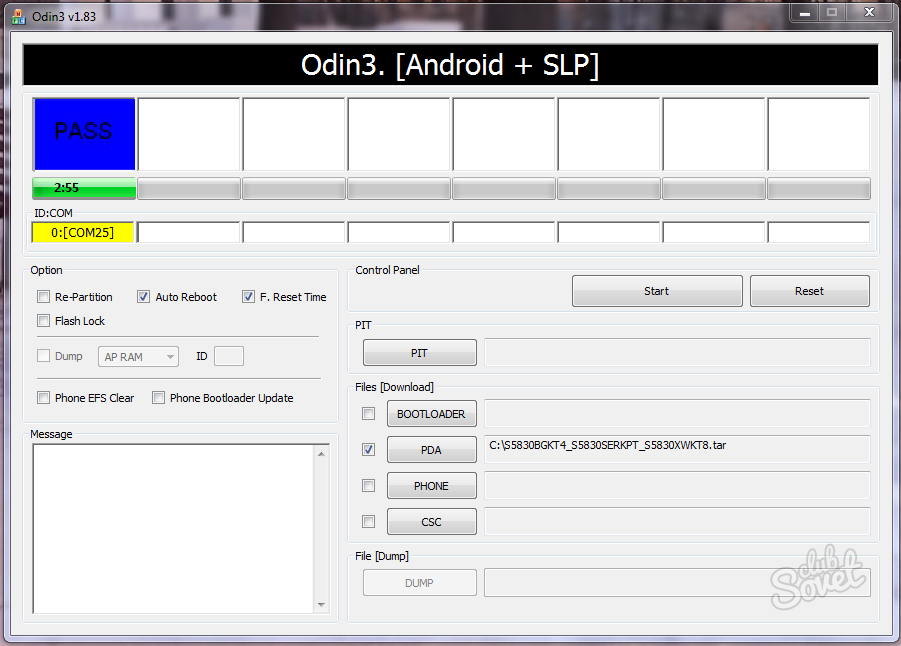
- launch the previously installed Odin, a message should appear in the lower left window stating that your device has been added;
- Load the firmware files found for your specific (!) model by pressing the PDA button in the ODIN program;
- Feel free to click “Start” and don’t interfere with the utility doing its job;
- when a blue field with the inscription “PASS” appears at the top, the unlock is complete;
- close all programs, disconnect devices and check whether root is received.

If the smartphone does not respond to manipulations after the firmware, going into eternal loading, you should reset it by pressing the Reset button on the case.
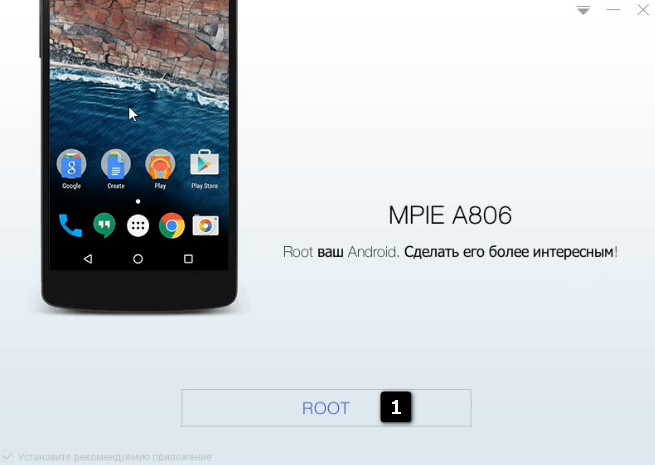
How to install Root rights on Android using the program Kingo Root. With Kingo Root you can install Root on HTC, Huawei, Lenovo and any device under Android control . IN in this example, I will install Root on the Chinese flagship MPIE A-806
If you have a flagship of a well-known model (HTC, etc.), you can try to install Root rights via .apk (a regular application for Android)
To do this, download Kingo-Root.apk and try to install Root through it (this is an easier way than what will happen next)
After downloading, set it in your phone "unknown sources" and install KingoRoot. After installation, launch the program, press the key in the center of the screen, if you are lucky, you will Root through the application.
Installing root on android kingo root (5 4.42 4.2.2). After pressing the big key below, the application will try to Root. If not, an error will appear
If you get an Error, then read on
Installing root on android via kingo root for Windows
To use this method, you will need the Android-Root.exe program (from the creators of Kingo Root)
After downloading Android-Root.exe, install it on your computer.
Now run the program and connect your phone via USB
Allow USB debugging
Let's go to Settings — For developers — Allow — USB Debugging(put a mark)
Installing root on android kingo root (5 4.42 4.2.2).

We set USB debugging (1) Settings - (2) For developers - (3) On. USB Debugging
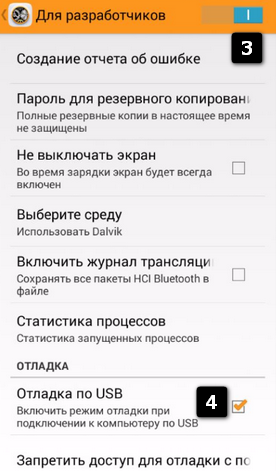
We set USB debugging (1) Settings - (2) For developers - (3) On. USB Debugging
We continue the installation of Root, launch Kingo Root again (when USB debugging is set)
Great! Now there is very little left to teach Root access. Open Kingo Root again.
After this sign appears, look at your phone and allow access to USB debugging
![]()
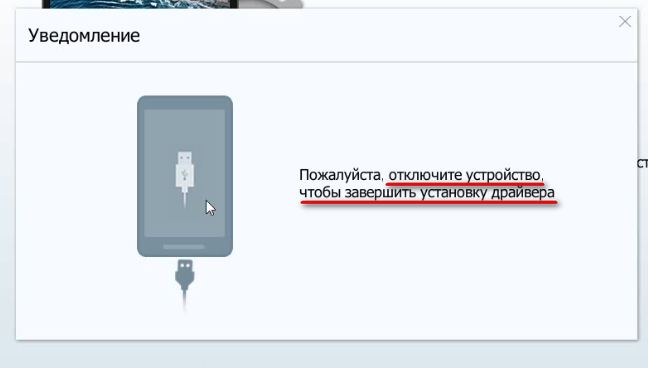
After this, the program will start working. After a few minutes, the program will ask you to reconnect the phone, do this (first unplug the USB from the phone, and then insert it back into the phone)
After 1 minute, I got a sign that the phone was ready to receive Root rights. Great, click the big blue Root button
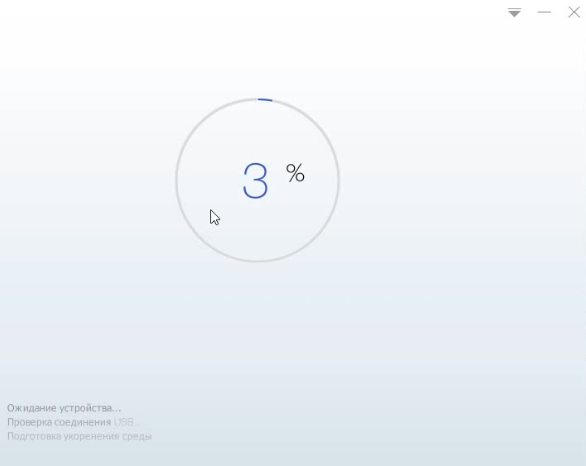
The Root process has begun. After 50%, your phone will go into Reboot 5-6 times. Process Root Android MPIE A806, took me 20 minutes.
After 50% your phone will reboot 5-6 times, don’t worry, this is how it should be
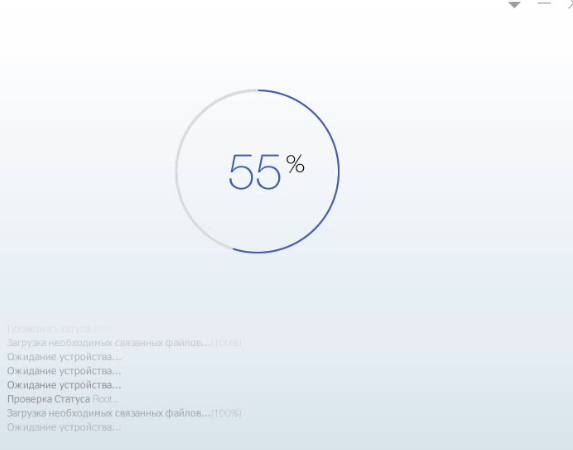
After 55%, 10-12 minutes passed and I received a sign that Root was completed successfully!
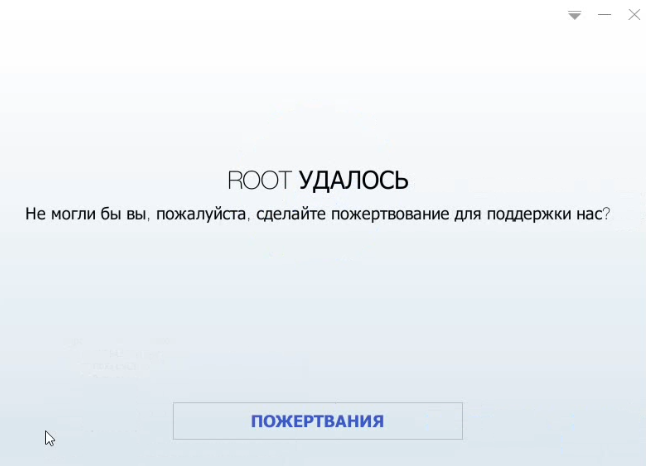
Now on Chinese phone There is Root access and you can install any programs on it.
Here it is, light and reliable way, obtaining Root rights to an Android device using Kingo-Root