Monitor calibration is very important for your laptop or computer, modern desktop OS, like Mac OS X, offer built-in tools for calibrating your monitor's brightness, contrast, gamma, and color levels. This can improve the readability of on-screen text and also give images and videos more natural colors.
Of course, professional digital photographers will want to use colorimeters for this. But if you don't have such a tool at your disposal, and you just want to make small adjustments, you can rely on your own eyes.
Before proceeding with adjustments, make sure you are using the native resolution of your monitor.
Monitor calibration buttons built into the monitor
If your monitor has adjustment buttons, you can use them. However, it is difficult to adjust the options without any guidelines. Use Lagom's LCD Test Pages (or other similar tool) to get test images that you can refer to as you calibrate multiple settings. Read through each page one by one. They will provide instructions on what to pay attention to when setting up the various monitor options.
Suppose you are working on a laptop and there are no such buttons on it. Then you'll have to turn to the tools built into Windows and Mac OS X.
Windows 10, 8.1, 8 and 7
Windows has a built-in screen calibration tool since Windows 7. To launch it, open Control Panel. In Windows 10 or 8.1, this can be done by right-clicking on the Start icon and selecting Control Panel.
In the Control Panel window, click Hardware and Sound, then Display, and then click the Color Calibration link on the left side of the page.
Alternatively, you can open the Start menu, search for "calibration" and click on the "Calibrate Monitor Colors" shortcut to launch the calibration tool directly.
The Calibrate Screen Colors tool will appear on the screen. It will help you change various options such as gamma, brightness, contrast and color balance, explaining what each parameter means and how it should be configured. The Windows developers have done a good job, so just follow all the on-screen instructions.
Mac OS X has its own built-in screen calibration tool. To open it, click on apple menu at the top of the screen and select System Preferences. Then, in the list that appears on the screen, click on the “Monitor” item.
In the window that opens, go to the “Color” tab and click on the “Calibrate” button.
An application called Monitor Calibrator Assistant will open. This utility will guide you through the process of calibrating your monitor settings, telling you everything you need to know and explaining how to properly configure each option. Different options may be available for different monitors. The assistant will explain to you what to look for while setting them up.
Control panels in modern Linux desktop environments may also have tools for calibrating screens. Of course, if you're using a desktop computer running Linux, you can download calibration guides on the web and do it manually using the buttons on the monitor itself.
Chromebooks and Chromeboxes don't have built-in screen calibration tools because they're simply not integrated into Chrome OS. However, if you are working with similar devices via an external monitor, you can use the above web pages and change the options manually through the buttons on the monitor.
When developing Windows 10, Microsoft specialists changed the familiar screen settings interface. It has become simpler, allowing users to produce various settings on an intuitive level. Definition optimal parameters screen occurs already during installation of the system in automatic mode. All that remains is to configure them for a specific user, if the need arises. The set parameters must correspond to the maximum capabilities of the display screen and video adapter. This achieves the clearest graphics and color gamut.
Setting the screen resolution
Setting up the screen on a personal computer, tablet or laptop with Windows 10 is not very difficult for any user. Its interface is simple and intuitive, which allows you to modify the screen at your discretion in a few clicks. To configure:
- Click on the “Options” icon. In the Start menu, click on the Settings icon
- Click the System icon in the Settings window.
 In the "Options" window, click on the "System" icon
 - Open the "Screen" tab.
 Review your screen settings
 - Check your screen resolution. It must match the recommended resolution of the device.
- If the resolution is set correctly, click on the “Graphics Adapter Properties” button.
 Click on the "Graphics Adapter Properties" button
 - Make sure that your adapter is selected in the “Adapter Type” tab.
 Check that the video adapter is installed correctly
 - Close Graphics Adapter Properties by clicking OK.
- Change the screen resolution if necessary.
- Close the System Settings window.
- Screen setup is complete.
Other screen parameters can be adjusted as needed.
When installing Windows 10, all screen settings are usually configured automatically. The exception is rare or outdated types of video adapters, the drivers of which are not in the database on Microsoft servers. In this case, the driver is downloaded from the manufacturer’s website or installed from an optical disc that is included with the computer or laptop upon sale. It contains distribution kits of all drivers for installed devices.
Video: how to change screen resolution on a computer, monitor or tablet with Windows 10
Increase or decrease screen brightness and contrast
Brightness and contrast are some of the main screen settings. Each user adjusts them individually to their own requirements.
Contrast on laptops and tablets is adjusted automatically. On monitors and displays personal computers There is a Menu button with which you can adjust the contrast using the device menu.
There are several options you can apply to change the screen brightness settings.
Changing screen brightness in system settings
There are two ways to access screen options:

Video: How to change screen brightness through Windows 10 settings
Changing screen brightness using the keyboard
Almost all modern types of keyboards have the ability to change the screen brightness without resorting to system settings. Previously, only laptops had this feature, but now this function is also inherent in many types of personal computer keyboards. As a rule, you can change the brightness using two keys, which have a sun icon and an arrow indicating an increase or decrease in brightness. They are most often located in the upper or lower case of the keyboard.
 Use the keys to adjust the brightness level of your screen
 In some cases, you may need to press the Fn key along with these keys to change the screen brightness.
If the keys do not respond to commands to change brightness, download and install the keyboard driver from the manufacturer's website.
Changing screen brightness through Notification Center
In the Notification Center, you can set the screen brightness level only in fixed positions. To change the brightness level, follow these steps:

Change screen brightness using the battery indicator on the "Taskbar"
On laptops and tablets, there is a battery charge indicator on the “Taskbar”, which can also be used to change the screen brightness:
- Left-click on the battery charge indicator.
 Click on the battery indicator
 - Click on the screen brightness change tile.
 Adjust the screen brightness level
 - You can change the brightness level using fixed values from 0 to 100% in 25% increments.
- Click on the "Power and Sleep Options" tab.
 Click on the "Power and Sleep Options" tab
 - Click on the “Advanced power settings” line on the right side of the “Settings” window that opens.
 Click on the "Advanced Power Options" tab
 - In the “Power Options” window, set the required brightness using the “Screen Brightness” slider.
 Adjust the screen brightness level using the slider
 - Click on the “Power Plan Settings” tab.
 Click on the “Power Plan Settings” tab
 - In the “Change circuit parameters” panel that opens, use the “Adjust brightness” slider to achieve its optimal level when powered from the mains and from the battery.
 Adjust brightness on mains and battery power
Changing screen brightness through the Start menu
You can also use the Start key to access the screen brightness settings panel. To do this you need to do the following:

What to do if the screen is flickering
Frequent screen flickering in Windows 10 can be caused by two problems:
- usage outdated drivers video adapter;
- incompatibility of what is installed on the computer software application and system requirements.
The problem does not occur as often as it did when Windows 10 first began to spread.
This is due to the fact that the main companies that produce components for computers have brought their software applications to the required parameters. On those computers with video adapters manufactured 6–7 years ago, incompatibility may occur, since their drivers were not developed taking into account modern requirements.
To resolve the error, you need to find out whether the driver or software application is the source that creates the screen flickering.
- To solve the problem and restore normal operation of the screen and video adapter, you must use the following method:
- Right-click on the “Taskbar”.
 Click on the “Task Manager” line.
 - In the menu, click on the line “Task Manager” Check for blinking in the Task Manager panel. If the panel blinks along with the screen, then the reason is the old video adapter driver.
 If this does not happen, then the reason is in one of the installed software applications.
 - Check for blinking Task Manager panel
 Double-click the “Control Panel” icon on the “Desktop”.
 - On the “Desktop”, double-click on the “Control Panel” icon
 Click on the “Administrative Tools” icon in the “All Control Panel Items” window.
 - Click on the “Administration” icon
 Double-click Computer Management in the Administrative Tools window.
 - Double-click on “Computer Management”
 Expand the Event Viewer tab in the Computer Management window.
 - Expand the Event Viewer tab
 Expand the Windows Logs tab.
 - Expand the Windows Logs directory
- Check the Application and System tabs for errors.
 If a software application compatibility error is detected in the “Application” tab, then remove it. Then download the latest version of the application from the developer’s website and install it on your hard drive.
 - Click on the Application tab and check for errors
 If an error in the “System” tab indicates that an updated video adapter driver is needed, then perform the same operations as for the software application to replace it.
Click on the "System" tab and check for errors
What to do if applications or games do not open in full screen
All modern programs automatically adjust to the screen size. If you install an application or game that was developed many years ago for older editions of Windows, then it can be deployed in a reduced size. In this case, it becomes necessary to expand them to full screen. There are several ways to solve this problem:
- Using hot keys:
- press on the keyboard at the same time Alt keys and Enter;
- the application will expand to full screen;
- When you press the keys again, the application will return to its previous state.
- Changing launch options:
- right-click on the game or application icon on the “Desktop”;
- Select “Properties” from the drop-down menu;
 Select “Properties” from the drop-down menu
 - in the panel that opens, click on the “Compatibility” tab;
 Click on the Compatibility tab
 - press the “Run Compatibility Troubleshooter” button;
 Click on the “Run Compatibility Troubleshooter” button
 - If the application is not maximized to full screen, then check the “Compatibility Mode” box and select the required edition of Windows from the drop-down list. It must be kept in mind that Windows edition 10 is not on the list. Last on the list will be Windows 8.
 Select the required edition of Windows
 - Click the "OK" button.
- Update video adapter drivers:
- determine the video adapter model in Device Manager;
- go to the manufacturer’s website;
- download and install the new driver.
- Change graphic settings games:
- launch the game;
- go to settings;
- find the item for changing screen settings;
- You put full screen mode;
- restart your computer.
- Changing screen resolution:

If a game or application requires a screen resolution of 640X480, then you can set it in the “Options” block on the “Compatibility” tab. But it must be a very old game or application that was created during the introduction of Windows into the software market.
Video: How to run an application in compatibility mode in Windows 10
Calibrate the touch screen on Windows 10 tablets
Calibration touch screen must be performed for the tablet to respond adequately to finger touch. If the device is not calibrated, then instead of the letters you press, others will appear on the screen or the image will rotate one hundred and eighty degrees.
To calibrate the touch screen, you need to do the following:

Disable turning off or dimming the screen
With prolonged inactivity, the display screen goes dark after a certain period, and after a few minutes the computer goes into sleep mode, turning off completely. In the system parameters, you can set the option when the transition to sleep mode and screen dimming are turned off. To disable the energy saving mode, you need to perform a number of operations:
- Left-click on the “Start” button.
- Open Settings.
- Select the "System" section.
- Click on the “Power and Sleep” icon.
- Click the "Advanced power options" button.
- In the “Power Options” window, click on the “Configure power plan” button.
 Select "Power Plan Settings"
 - In the “Turn off display” line, disable screen dimming when running on AC power or battery power. To do this, select “Never” from the drop-down lists.
 Select "Never" from the drop-down list
 - Similarly, in the fields next to the “Put the computer into sleep mode” icon, disable putting the computer in the off state.
 In the drop-down list, click on “Never”
 - Click "Save Changes".
Video: a non-standard way to disable screen dimming
One of the main criteria for a graphical interface is brightness, contrast and color gamut. The clearer the display looks graphic objects, the more comfortable the work will be for the user. Therefore, do not neglect spending a few minutes in order to achieve maximum effect when displaying graphics and text documents. It should be remembered that incorrect setting Screen settings also affect the user's visual system and can lead to gradual deterioration of vision. To adjust the screen and fix minor problems with the image, you can use the methods given in this article. If they do not lead to the desired result, then you should contact the service center specialists.
Today you will learn how to customize the color settings of the Windows 10 operating system. You will be able to select the main background color and configure additional settings. To manage color settings, open the Start menu. In the window that opens, click on the tab - Settings.

Automatic selection of the main background color; by default, the background color is set automatically. If you turn off this option, you can choose the color of the main background yourself.

Show color in the Start menu, taskbar, action center and window title bar, this option is disabled by default, you can enable it.
Make the Start Menu, Taskbar, and Action Center transparent, enabled by default, but you can turn off transparency.

At the bottom of the page you will have a tab - High Contrast Options, where you can adjust the contrast settings.

We've covered the basic color settings on Windows 10. Good luck!
Color settings Windows 10 updated: July 24, 2016 by Ilya Zhuravlev
info-effect.ru
Windows 10 window color settings
At the end of last year, Microsoft released another update for Windows 10 that allows you to change the title colors of active windows. But this feature is not available to all users.
Requirements
Setting the color scheme of Explorer elements is available only to users who use activated Windows 10 s installed update 1511. For a non-activated OS, the function of changing window color, like the entire personalization section, will be unavailable, and it will not work without the specified update.
Therefore, update your activated (or jailbroken) Windows 10, preferably installing all available updates, and restart your computer.
If you don't want to do this, install at least update 1511 (build number 10586). You can check whether it is installed in the system settings. See the lines “Building OS” and “Version”.
Algorithm for changing conductor parameters using “tens”
In Windows 10, the colors of windows change without any kind of hacking, which consists of replacing themes and parameters in their configuration. Now everything can be done using the operating system.
- Calling context menu desktop, select “Personalization” from the drop-down list of available functions.
The same can be done in a more complicated way: go to “Start”, click “Settings”, and then “Personalization”.
- Activate the “Colors” tab, which allows you to change the design Windows windows 10.
- Activate the option shown in the screenshot.
- Select the color you like from a small list of suggested ones and save the new window design settings.
Keep in mind. When you activate the option to automatically select the main background color, Windows 10 will automatically select the color of windows and other Explorer components (if the corresponding option is enabled), based on the range of wallpaper installed on the desktop. Moreover, if the wallpaper is not static, the palette of explorer elements also changes dynamically, based on the current picture set as its background.
Set your own active window design parameters
If the proposed list does not contain the color that you would like to see in the window title, you can add it yourself, rather than using the 10 options that the developers offer.
- Launch the registry editor by running system command"Regedit" in search bar or command interpreter line.
See also: Easy transition to Windows 10
- Find the first or one of the first keys called “AccentColor” and double-click on it.
- In the “Value” field, enter the color code in the hexadecimal number system.
This code can be found by using the appropriate online service for converting colors or using a utility, for example, Color point.
Surprisingly, instead of color encoding in this case, for some reason, BGR is used rather than RGB. This means that the first two characters in the code must be swapped with the last two. For example: you need to set the color with code 65AD01. 65 is swapped with 01 and enter the code “01AD65” in the “Value:” field.
Immediately after clicking on the “OK” button, the new settings will take effect, without requiring the user to restart the computer or explorer. You just need to switch to a new window.
After turning off the option to change the color scheme of the window title, the key value will be reset, and next time you will have to enter it manually again.
Personalizing inactive windows
IN Windows registry 10 there is also the ability to change the color of an inactive window. To do this, go to the registry section as above. We create a string parameter called “AccentColorInactive”, enter its color, as before, taking into account that Microsoft uses BGR encoding for this.
Configuring Start and taskbar colors
The current registry key contains several more keys that allow you to set the color of the Start and Taskbar without affecting the window design.
- In the “Color” tab of the “Personalization” menu, activate the option responsible for displaying color in the Start, notification center and taskbar.
- Switch to the registry editor and change the “ColorPrevalence” value to “0”.
As a result, the above-mentioned elements will be colored in the color selected from the list, and the window headers will not change the color scheme, that is, they will remain as they were specified, even if their color value was entered manually, taking into account the RGB-BGR conversion.
Changing the color scheme of the “Taskbar”
To set your own color for the “Taskbar”, you need to go to the section:
Here we find a parameter already known to us called “ColorPrevalence” and enter its value equal to “2”.
Afterwards you will have to restart Windows 10 or Explorer. We will choose the second option due to its simplicity. We launch the “Task Manager”, on the “Processes” tab we find the element of the same name, call up its context menu and select “Restart”.
In principle, the Winaero Tweaker utility allows you to do all this, automating almost everything routine tasks to search, create and edit keys, so setting the window color will only take a few seconds.
(Visited 4,745 times, 7 visits today)
windowsprofi.ru
Adjust contrast on a Windows 10 computer
Hello! We continue to disassemble the Windows 10 operating system! Today you will learn how to adjust the contrast on Windows computer 10. You can choose and customize ready theme with contrast settings. To adjust the contrast, open the Start menu at the bottom left of the screen. In the window that opens, click on the “Settings” icon or tab.


At the top of the page, click on the field, select a topic. In the theme you can configure:
Disabled text color.
The color of the selected text.
Button text color.
Background color.

After setting the parameters, click the button below - Apply. After which the contrast on your computer will change.
Still have questions? Write a comment! Good luck!
Adjust contrast on a Windows 10 computer updated: January 27, 2017 by Ilya Zhuravlev
info-effect.ru
Setting monitor color: step-by-step instructions
Everyone knows that spending a long time at the computer is bad for your health. This especially affects a person’s vision. The fact is that a person is not able to see the frequency of flickering of the monitor screen, but the eye catches this frequency, and over time, weakening of vision may occur. When using the computer, your eyes gradually get tired and stop focusing clearly on the image. But for many, a computer is a job, which means it’s impossible to avoid this harm. In order to reduce it as much as possible, proper adjustment of the monitor color, as well as its resolution, is required.
Configuration using AdobeGamma program
To optimally display colors, you need to make adjustments using a special program called AdobeGamma. The first thing you need to do is install it on your computer. After installing the program, you should set the screensaver on your desktop in a solid gray color. Setting monitor colors in Windows 7 for the desktop is in the “Personalization” section, which appears in a pop-up window when you right-click on its splash screen (background). There you need to select the “Desktop Background” item and in it the “Image Position” drop-down menu, in which there is a “Solid Colors” menu item. The gray color can be seen immediately.
Now it's time to proceed directly to the procedure itself. After launching the AdobeGamma application, setup is carried out using the setup wizard (you need to select this option), a special program that allows you to go through the entire process step by step. The next step is to select a “color profile”. It is generally recommended to leave the default profile (for inexperienced users). Now you need to click on the “Next” button to continue and set the contrast to the maximum value. The brightness should be adjusted so that the square, which is located inside another square, is as close to black as possible, but still stands out a little against its background. You can simply skip the next stage.

Next, you need to configure the gamma correction using the bottom tab of the general settings window. If the program for adjusting monitor colors is not localized, it will be called WindowsDefault. To the right of it there is a small field where you are prompted to enter the value of the Gamma parameter. The most commonly used is 2.2. In the same window, you need to uncheck the ViewSingleGammaOnly parameter to display gamma values by color. Now, using the mouse, you need to bring the result to such a state that all three squares become absolutely indistinguishable from their background. At the next stage, the color temperature value is set, which should be equal to 6500K. The setup is now complete. After completion, it is possible to compare the result obtained with the initial value. To do this, use the Before and After buttons. Color settings Windows monitor 10 is carried out in a similar way with the only difference being that the versions of the AdobeGamma program may differ.
Adjusting the image using monitor functions
Almost all monitors have special functionality (menu) with which you can quickly make color corrections. The interface of such a menu is as clear as possible and is translated into Russian for most devices, so to change the contrast, color or brightness of the screen, you simply need to select the appropriate item using the buttons located below. For more detailed information, you can refer to the instructions from the manufacturer, which usually comes with the device. For example, color adjustment Samsung monitor occurs using a special Menu button located under the screen, when pressed, the monitor menu appears. It has two main sections responsible for color rendering - Picture and Color, which will help you make all the necessary settings. For different manufacturers and different models, these sections may be called differently, but the meaning is ultimately the same.

Setting the image through the system
The Windows system itself also provides functions that allow you to adjust the color of your monitor. There is a program for this called “Calibration”, which can be found by searching in the “Start” menu. The application itself will tell you what to do next after launching it. An important parameter is the correctly selected screen resolution, optimal for the monitor being configured. Typically, in the drop-down menu listing acceptable screen resolution values, it is marked as “Recommended”. This is exactly what you should choose. This parameter is located in the video card settings. To get there, you need to right-click on the desktop and select the appropriate item in the menu that appears. It is called differently for different video card manufacturers, for example, for NVIDIA you need to look for a line called “NVIDIA Control Panel”, and for Radeon – “Radeon Graphics Characteristics”. All other color rendering settings are also located there. To achieve the best result, in addition to the correctly selected screen resolution, you must select the highest color depth of 32 bits. As a rule, this setting is always located in the same place as the screen resolution setting, so it won’t be difficult to find it.

Adjusting screen brightness
Surely many people have noticed that the monitors standing on the stand in the store have a visually different image. On one it is dimmer, and on the other, on the contrary, it is too bright. This is due to different color settings for each individual device. If the buyer is not satisfied with the default color settings of the monitor, he can change them. To do this, you need to press the button with the name Menu and in the panel that appears, select the Picture value, where the brightness and contrast settings are located with the adjustment sliders located to the right of them. It is worth noting that for different models and manufacturers the names of these parameters may vary or even be marked with schematic figures, but the general meaning is always clear to the end user.
After finding the desired settings, you need to take a clean white sheet of paper, put it in front of the monitor, create a regular blank document using the Notepad program and compare the color of the sheet of paper with the white background of the document in the program. This procedure is carried out to evaluate and subsequently adjust the white color of the monitor. Next, for the slider responsible for the brightness of the picture, you need to find a position such that the white color on the monitor matches the white color of the sheet of paper on the table.
Adjusting the screen contrast
To adjust the contrast, two images of identical shirts of different colors can help: one shirt is black and the other is white. The main thing is that the colors are monophonic. Both images need to be opened and placed next to each other. Now you should move the slider responsible for contrast until the folds on both shirts become clearly visible. Once you achieve this effect, you can adjust the brightness a little more. At this point, the process of completing the brightness and contrast settings can be considered complete. The white color obtained as a result of these manipulations may differ from the monitor settings that were set by default at the time of its purchase. However, experts say that this is just an optical illusion caused by the eye getting used to the original values.

Adjusting laptop color using Windows
Laptops have long become an integral part of our lives. It is enough to configure the laptop correctly once, so that later there are no unnecessary problems and you do not have to spend additional time. Setting the colors of a laptop monitor is not very different from the settings of a regular monitor. They are located in the “Color Management” section in the Windows control panel. Having entered the section, you need to select the “Details” tab and then click on the “Calibrate screen” button. Then simply follow the instructions provided by the setup wizard.
Adjusting laptop colors using the intelHDgraphics app
But this is not the only method applicable to solving this problem. For example, there is software that solves this problem better. If the laptop runs on an Intel processor, then the color should be adjusted through the “Graphics characteristics” section. You can get there using the same pop-up menu, called by right-clicking the mouse. When you open a section, a window will appear with several categories responsible for the video card parameters. To adjust the color, select the “Display” category. There, in the “Color” tab, you can find the “Advanced” tab, in which the necessary color adjustment controls are located. The only parameters are hue and saturation, with the help of which the adjustment is made. The level of increase or decrease in values is determined by the user himself based on his needs.

Features of adjusting brightness on a laptop
It is known that if you need to quickly adjust the monitor screen, you can use the button interface located on its body. But on a laptop, things are a little different, and to be honest, for many uninformed users, this becomes a real problem. The fact is that there are simply no such buttons on the laptop body. This is not due to the lack of space for this functionality, but to the fact that the optimal image is selected by the equipment developer.
But sometimes the need for quick color correction arises. To solve this problem, the laptop has a special Fn key, which is responsible for additional functionality. When you hold down this key, additional functions of the keys are activated, which contain icons highlighted in a different color. To adjust the brightness of the monitor, you need to use the keys with the image of a sun (standard brightness icon).

Testing color rendering using Real Color
There is another remedy that is considered the standard in certain circles. This is a special Real Color wallpaper that bears some resemblance to the tuning grid once used on televisions. When using this method, special wallpaper with the optimal resolution for a computer or laptop is installed on the desktop. By looking at the screen from a normal distance, you can determine whether the color rendition is calibrated correctly. With the correct setting, a smooth gray gradient should be visible, and if stripes appear and shades are mixed, then the color is set incorrectly.

To summarize, we can say that adjusting the monitor color is a rather painstaking task and depends on many factors. Therefore, for each individual case, its own parameters must be applied to meet specific needs. But in order not to get scattered among many different methods, you need to do this: for quick setup use the built-in system parameters, and for more complex tasks you can resort to third-party applications.
xroom.su
How to adjust colors on a laptop
A laptop is a constant companion of a 21st century person at work, at home, and on the road. It is known that the time spent on setup software, will later pay off when you don’t have to spend it on unnecessary actions or waiting for the operating system to respond. It is equally important to correctly configure the color rendition of the laptop display - this is necessary both for designers, photographers, etc., and for ordinary users. It’s not that difficult to make your eyes less tired and your vision not to deteriorate.
To avoid color distortion, the laptop should be located in a place where it is not exposed to outside light. Designers, for example, use special curtains - then there is no threat of glare or light exposure.

The simplest and quick way– display calibration using the built-in program (using Windows 7 as an example). To launch it, go to the “Control Panel” and select “Color Management”. In the “Details” tab, you need to click on the “Calibrate screen” button and then follow the instructions.

There are other special programs that help adjust colors - these are Adobe Gamma, Corel Draw, Ati Catalist Control Center. In order to use one of them, for example, Adobe Gamma, you will need a source color scheme that you can use as a reference when changing color parameters. The pattern consists of stripes with gradations of different colors. For correct settings, first set the color temperature. Next, to calibrate the display of a home laptop, look at the gray stripe - 32 rectangles should be clearly visible on it, including the ones on the left and right. To evaluate the result, print the resulting image, always in the “Grayscale” mode. If necessary, change the adjustments further until the colors on the paper and display are identical, then save the result.

The convenience of this program is that it can be added to “Startup”, then personal screen settings will be loaded along with Windows. To do this, you need to copy the Adobe Gamma shortcut to the Startup folder (you can open it from the All Programs tab in the Start menu).

As a result of the adjustment, the brightness, contrast and color gamut will fade. That's how it should be. Over time, as your eyes adapt to the changes, you will stop noticing it.
Hello! We continue to disassemble the Windows 10 operating system! Today you will learn how to enable and configure the touchpad on a Windows 10 computer. To configure touchpad, at the bottom left of the screen, open the Start menu. In the window that opens, click on the “Settings” tab or icon.


You can configure:
You can enable or disable the touchpad on your computer.
You can enable or disable the touchpad when you connect a mouse.
You can enable or disable touching on the touchpad.
You can turn two-finger drag to view on or off.
You can turn zooming on or off using a two-finger pinch gesture.
You can enable or disable double-tapping instead of right-clicking.
You can enable or disable double-tapping and dragging.
You can enable a touchpad action similar to right-clicking a mouse. You need to click on the lower right corner of the touchpad.
You can select functions for three-finger touch.
You can select objects for three-finger dragging and sliding.
Still have questions? Write a comment! Good luck!
Sensory Windows panel 10 enable configure updated: January 13, 2017 by: Ilya Zhuravlev
info-effect.ru
What is multitouch and calibration
If we say what multi-touch is in a tablet in ordinary words, then it is its ability to recognize several touches at the same time. So, the first tablets had resistive displays and could only understand one touch (+ there was an imitation of the second). True, this is also considered multi-touch. After the advent of capacitive models, the possibility of multi-touch appeared. At first there was an understanding of only two touches, but now their number reaches 10.


Why do you need Multi-Touch?
- Device management
- Games and entertainment
- Special Applications
The system uses multi-touch to control widgets and other system applications. Much more opportunity is realized in third party applications. For example, Google Maps perfectly demonstrates the capabilities of multi-touch. With just two fingers you can go anywhere on Earth.

Interesting technology implemented in Windows systems. You can program your own gestures. That is, to give each movement almost any function or option.
But in games, multi-touch reveals its full potential. They often use a joystick on which you need to press several buttons at the same time. For example, take the game Mortal Combat, where you need to press different combinations of buttons to achieve certain hits, combos and fatalities.

How to check Multi-Touch?
How to check multitouch on a tablet? It's easy to check multitouch. There is a primitive way. Right at the inspection site, launch the camera and take a photo. Open it and, by moving two fingers apart and sliding on the display, see if the picture enlarges/shrinks.
To check for more than 2 touch points, download one of special programs. For example, Multi-Touch Tester. It is small in size and immediately determines the number of possible touches. In addition, you can personally see the result by touching the display again.

Calibrating the tablet display
Calibration is needed so that your gadget responds adequately to the touch of your fingers. An uncalibrated device behaves as follows. For example, you write an SMS, press the letter “A”, and the display shows the letter “K” or “E”. Not very convenient, right?
Calibration in Windows
Since the tablets contain several Windows options, then there are several ways to calibrate the screen. Or rather, there are several ways to get into a special application for this. In inferior Windows (such as Windows 8 CP), you need to open the general settings. Almost at the very bottom of the window there will be a treasured button. IN full versions The option is in screen personalization.


How to calibrate your Android tablet
IN Android devices(not all) the option is located in the “Display” section of the Gadget Settings and is called “horizontal calibration”. Once you open the application, follow its instructions. More and more new devices no longer have this option, apparently focusing on iOS.
Calibration in iOS
As you understand, there is no such option in iOS, since the developers claim that it is simply not necessary. In fact, any device, no matter how calibrated it is at the factory, tends to get upset. This is influenced by many factors.
What is multitouch on a tablet: Video

It's easy to thank - click on any of the social media buttons
kingdia.com
Screen calibration. How to calibrate your monitor on Windows or Mac |
Monitor calibration is very important for your laptop or computer, modern desktop operating systems like Windows and Mac OS X offer built-in tools to calibrate the brightness, contrast, gamma and color levels of your monitor. This can improve the readability of on-screen text and also give images and videos more natural colors.
Of course, professional digital photographers will want to use colorimeters for this. But if you don't have such a tool at your disposal, and you just want to make small adjustments, you can rely on your own eyes.
Before proceeding with adjustments, make sure you are using the native resolution of your monitor.
If your monitor has adjustment buttons, you can use them. However, it is difficult to adjust the options without any guidelines. Use Lagom's LCD Test Pages (or other similar tool) to get test images that you can refer to as you calibrate multiple settings. Read through each page one by one. They will provide instructions on what to pay attention to when setting up the various monitor options.
Suppose you are working on a laptop and there are no such buttons on it. Then you'll have to turn to the tools built into Windows and Mac OS X.

Windows 10, 8.1, 8 and 7
Windows has a built-in screen calibration tool since Windows 7. To launch it, open Control Panel. In Windows 10 or 8.1, this can be done by right-clicking on the Start icon and selecting Control Panel.
In the Control Panel window, click Hardware and Sound, then Display, and then click the Color Calibration link on the left side of the page.
Alternatively, you can open the Start menu, search for "calibration" and click on the "Calibrate Monitor Colors" shortcut to launch the calibration tool directly.

The Calibrate Screen Colors tool will appear on the screen. It helps you change various options such as gamma, brightness, contrast, and color balance, explaining what each setting means and how you should adjust it. The Windows developers have done a good job, so just follow all the on-screen instructions.


Mac OS X has its own built-in screen calibration tool. To open it, click the Apple menu at the top of the screen and select System Preferences. Then, in the list that appears on the screen, click on the “Monitor” item.
In the window that opens, go to the “Color” tab and click on the “Calibrate” button.

An application called Monitor Calibrator Assistant will open. This utility will guide you through the process of calibrating your monitor settings, telling you everything you need to know and explaining how to properly configure each option. Different options may be available for different monitors. The assistant will explain to you what to look for while setting them up.
Control panels in modern Linux desktop environments may also have tools for calibrating screens. Of course, if you're using a desktop computer running Linux, you can download calibration guides on the web and do it manually using the buttons on the monitor itself.
Chromebooks and Chromeboxes don't have built-in screen calibration tools because they're simply not integrated into Chrome OS. However, if you work with such devices through an external monitor, you can use the above web pages and change the options manually through the buttons on the monitor.
Windows 10 users have the option to change standard settings screens that the system selects by default. Sometimes problems may arise during the process of setting up or using the monitor, but they are very easy to solve.
Screen settings
Personalizing screen settings helps you customize any screen so that it is as convenient for the user to use it as possible. Remember the settings that were specified before your intervention, so that if unsuccessful changes are made, you can quickly restore everything.
Brightness control
There are several ways to change the brightness: by changing system settings or using the functions of the screen itself.
Through screen capabilities
Look for brightness control buttons on your monitor and use them to turn the light up or down. But keep in mind that these buttons are not present on all monitor models. If they are not there, use the methods described below.
Use the monitor buttons to adjust brightness
Via keyboard buttons
Having learned the keys quick access, that is, from F1 to F12, you can find the button responsible for adjusting the brightness. Click or hold it to get the result.
This button may sometimes be missing or not work. In this case, use the methods described below.
Use shortcut keys to adjust brightness
Fast way
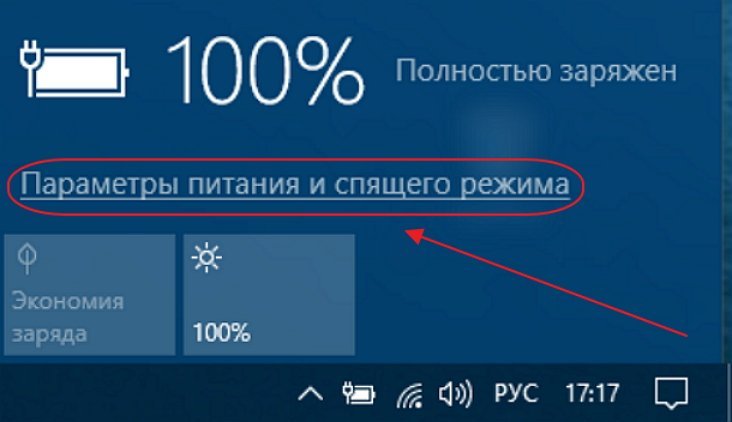
By clicking on the battery icon or message icon, you will see the “Brightness” block. Use it to select the brightness level you need.
Click on the battery icon and change the brightness
Through system parameters
- Expand system settings.
Open System Settings
- Go to the "System" block.
Click on the “System” block
- In the “Screen” tab, find the “Brightness level” item and move the slider. Click on the “Apply” button.
Move the slider to change brightness
Video: how to adjust brightness and other screen parameters
Via power settings
- In the system search bar, enter “Power Supplies” and open the proposed page.
Open the Power Options tab
- Open the settings for the plan you are using.
Click on the “Configure power plan” button
- In the list of parameters, find the line “Brightness” and move the slider to the appropriate value.
Adjust brightness in power options
What to do if brightness options are not available
Your screen may not support brightness changes, but this problem only occurs on older devices. Most often, the reason lies in the absence of the necessary driver:
- Go to Device Manager.
Open Device Manager
- Find the "Monitors" section and expand it. If you have the “Universal PnP Monitor” sub-item, right-click on it and use the “Enable” function. Done, restart your computer, go to the instructions above and try changing the brightness again.
Select the monitor and use the "Engage" function
- If there is a sub-item “Universal Non-PnP Monitor” or an icon indicating that there are no drivers, manually find and install them. To do this, find the monitor manufacturer’s website, download drivers for your model from it, return to the “Device Manager”, right-click on the monitor and select the “Update Drivers” function.
Download and update your monitor drivers
- Select "Search for driver software on this computer" and finish the procedure, and then return to the instructions above and change the brightness. You may need to restart your computer first.
Select manual search and specify the path to the drivers
Video: how to update drivers in Windows 10
Contrast settings
The easiest way to change the color ratio is using automatic adjustment, which can be started by the following steps:
- While in the system parameters, select the “System” block. In the "Display" tab, go to additional options.
Click on the "More display options" button
- Click on the “Color Calibration” button.
Open the “Screen calibration” section
- Read several pages of instructions, each time clicking the “Next” button.
- Go through the screen gamma adjustment process.
Perform gamma calibration
- Go through the brightness adjustment process.
Adjust the brightness
- Go through the contrast adjustment process.
Adjust the contrast
- Go through the color balancing process.
Customize color display
- Save or discard your changes.
Save your screen customization results
Video: how to calibrate your monitor in Windows 10
Changing the resolution
The number and density of pixels involved in displaying the image depends on the screen resolution. Each monitor model has its own recommended resolution value; you can find it in the instructions for the monitor or by searching through all the resolutions offered by the system:

Video: how to change screen resolution in Windows 10
Changing orientation, scale, adding multiple monitors
By going to the screen settings (the first step of the previous subparagraph), you can change not only the resolution, but also the scale, due to which all fonts and icons will become either larger or smaller.
Adjust screen scale
The orientation immediately changes from landscape to portrait or portrait and vice versa. This feature is only useful if you have a monitor with non-standard ratio sides, for example, elongated in height and not in width.
Select the appropriate orientation
If several monitors are connected to the computer, each of them will be configured separately. But first you need to recognize them by clicking on the “Detect” button. Once the search is complete, the options for each monitor will be available.
Click on the “Detect” button to recognize the new screen
Troubleshooting monitor problems
If you encounter problems while setting up or using your monitor, you should try to fix them yourself.
Blinking screen
If the screen starts to flicker only in a certain application or game, this means that the program is incompatible with your build and the problem is there. If the monitor blinks constantly, then there may be two reasons: a problem with the cable or drivers.
First, check that the cable connecting the monitor and the computer unit is not pinched or coming loose. Usually this is a VGA or HDMI cable. Unplug it from both connectors, plug it in again and check if the problem goes away. If possible, test the monitor using a different cable.
Check if the unit and monitor are well connected
Secondly, if you are convinced that the problem is not with the cable, update the drivers:

Games don't open full screen
Some games may default to opening in a window instead of full screen. If you want to fix this, there are two ways. The first is to use the combination Alt + Enter, which gives the command to stretch active window full screen, the second is to go to the settings of the game itself and set the value to “Open in full screen mode”. Usually the second method works 100%; the game either immediately opens on Full Screen, or does it after a restart.
Enable full screen mode in game settings
Screen calibration
Tablet users Windows control 10 or digital pen may experience that the system does not respond correctly to finger or pen touches. In this case, you need to resort to screen calibration:

Deactivating sleep mode and turning off the monitor
By default, if the user does not perform any activity for 15 minutes, the computer turns off the monitor. After another 15 minutes of inactivity, the system goes to sleep. This is necessary to save energy. But the power saving function can be deactivated or configured:
So, a computer monitor can be customized by changing its extension, format, brightness, contrast and scale. If there are problems with the screen, it is worth updating the drivers, checking the cable, or performing calibration. You can also configure the computer to go into sleep mode or completely disable it.