In the world internet marketing There has been talk for a long time about Google+ as an effective SEO tool. But many are still skeptical about it. Even now, some of our clients, when we recommend that they create a company page on Google+, ask in surprise: “Why do I need another social network? Is it really not enough that we are on VKontakte, Facebook and Twitter?”
In this article I will not describe in detail why, to whom and why this is needed, but I will answer briefly: if you want to be well represented in search results, a Google+ account is very desirable. So, let's take a step-by-step look at how to create a Google+ page for a business.
Create a Google Corporate Page
A page for your brand or company can only be created from an existing personal Google+ account. Log in to your profile, select: “Feed -> Pages -> Create Page”. For those who don't like to search, here is the link: https://plus.google.com/pages/create.
Selecting a page type
Well, everything is simple here. Each business has its own characteristics, so you are invited to make your choice from several options.
Filling out company information
Depending on which category you select, the information required to fill out will be slightly different. For example, for positions:
- business or place;
- product or brand;
- company or organization
you just need to choose your field of activity (cars, household appliances, etc.). It's even simpler:

Design customization
In this case, everything depends on you, and I don’t think it’s worth talking about the need for high-quality graphics once again. Change the logo and choose a cover for the page (its size is the first thing that surprises new Google+ users - 2120x1192). This is what our company's Google+ account looks like. By the way, if you haven’t added us to your circle yet, feel free to click .

Completing filling out company information
On the “About Me” page you need to provide brief information about the company, address, website, etc. Don’t forget about the keywords in the description, but also think about the users - the text should be informative and readable.
Connecting a Google+ account to your website
There are two main ways to link your Google+ page to a website:
- Using a link to Google+ from the main page of the site Google+.
- Insert into block code (in this case, there will be no link on the site. I don’t quite understand why there is such secrecy, but it will do as an option).
In turn, in your Google+ account, on the “About Me” tab, you need to put a backlink to your website.

…. And some tips:

And remember that Google+ is the second most active social network in the world, which is actively promoted by the search giant itself. With full control over the data, Google is already using it to determine Author Rank, and this direction will only develop. A clear idea of what users “upvote”, what they share with friends and what they recommend will significantly improve search results. This is a tool that is simply unwise to ignore now. As one hockey player I know says: “You need to move not to where the puck is now, but to where it will bounce.” Google+ is where you will catch that coveted “puck” if you move in the right direction.
microdistrict Chernaya Rechka, 15 Russia, Saint-Petersburg 8 812 497 19 87
Google+ from A to Z. Usage Guide

SHARE
The new Google Plus allows you to unite people not only in common circles, as it was before, but also based on common hobbies and interests.
This guide covers All What you need to know about using the new version of Google+.
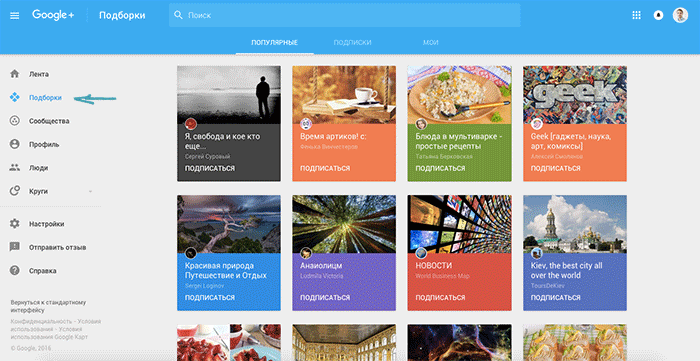
How to check out the new version of Google+
During the week, an invitation to try the new version pops up on Google+. A pop-up window appears in the lower left corner of the home page “Try the updated version of Google Plus.”
ADVICE:
If you're excited to try out the updated version, then head over to your Google+ page plus.google.com/apps/activities, click on the search field and, voila!, the page will refresh and reveal the new version of Google+.
If you are using the Google Plus app on your mobile phone, the new interface will appear after updating the app.
If you tried the new version of Google+ on the website and want to return to the classic version, click the "Return to standard experience" link in the lower left corner.
IMPORTANT NOTE regarding this Google+ guide:
According to Google, you can only see and change settings on certain platforms. If you can't find what you're looking for, try using a different device.
How to use the new version of Google+
The new version of Google Plus aims to share links, videos, images and other materials with people who share your interests.
- Use your feed to see the posts you are interested in and the posts of those you follow.
- Take advantage Collections to see and categorize messages by topics that interest you.
- Take advantage Communities to communicate with other people who share your interests.
A little education on how to use Google+
- Click on the button "Return to standard interface" to revert to the old version of Google+. I don't know how long this feature will be available.
Click on the button 'Ribbon' to view the posts you are interested in and the posts of those you are interested in signed.
Click on the button "Selections" to see and categorize posts by topics that interest you.
Press "Communities" to connect with other people who share your interests.
Press "Profile" to see only your own posts.
Press "People" to find people, follow them, see who you're currently following (that's where you can now manage your circles), or who's following you.
Press ‘Circles’ to see the circles (lists) of specific people you've created. (NOTE: if you don't see this option, go to "Settings", scroll down to "Additional settings" and press "Show circles in navigation menu" ).
IN ‘Settings’ you can adjust some profile features as well as your notifications.
Getting started with Google+: Feed

You can see your Google+ news feed by selecting "Ribbon" in the Google+ menu.
This is where you see posts that other people are sharing.
To fill your feed with content that's most interesting to you, follow other people in Collections or join Communities that interest you.
When you see a post in your Google+ feed, you can:
You can use the +1 button to show that you like a post that someone else has shared.
To add +1 to a post:
- Find the post you want to +1.
- Click on the +1 icon.
To cancel +1, click on the +1 icon again. You can also remove +1 in "Activity Log".
NOTE:To access your Activity Log, go to Settings => Apps & Entertainment => Manage Google+ Activity
To see this page now, just click on this link(This will take you directly to your Activity Log. You must be logged into Google+.)
Who can see your +1:
- People in your circles can see posts that you have +1ed in their feed and may receive a notification that you +1ed their post.
- Anyone who can view the post can see who +1ed this post.
- Your settings Social Recommendation affect how your name and photo may be used when you +1 a post.
Once again, you can go back and look at posts and comments that you have +1ed, as well as remove your +1, by checking your Activity Log.
Here's what the Google Plus Activity Log looks like:

How do +1s make your posts more visible?
People who see your posts and comments can +1 them.
Their subscribers can see that they +1 your post or comment, and you may receive an additional +1 on your post or comment.
How to comment on Google+ posts?
You can leave a comment under posts that other people post.
Anyone who can see a post you commented on can see your comment, reply to it, and give it a +1 unless you blocked it or they blocked you.
To comment on a post:
Once you leave a comment, you can edit or delete it:
NOTE:If you don't see a comment icon on a Google+ post, it means you don't have permission to comment on that post.
People can turn off comments on their posts after other people have left them, so you'll be able to see comments left on a post, but you won't be able to comment yourself.
How to publish a post on Google Plus?
How to ignore a post on Google+?
Sometimes a post you've shown interest in (commented or +1ed) becomes very popular.
This way, you'll see the post appear at the top of your Google+ feed and/or you'll receive notifications about that post—over and over and over again.
If you no longer want to see or receive notifications about specific Google+ posts in your feed, you can ignore this post.
To ignore an entry:
What's the difference between the two?
If you ignore a post on Google+, you will no longer see the post in your feed or receive notifications about it.
When you Ignore person...
How (and why) to ignore someone on Google+?
If you don't want to see messages or notifications from someone on Google+, you can ignore that person.
To ignore:
How to report to Google+?
If you see that someone is violating “Rules of publications and user conduct”, you can complain.
To report Google+ posts, comments, people, Collections, or Communities:
How to report a photo:
You can also block someone who posts something you don't want to see.
How to block a user on Google+?
If you don't want someone to be able to contact you on Google+, you can block them.
If you block a user:
- He will not be able to see your messages after blocking, or the comments that you left under other people's posts.
- He won't be able to tag you in posts or comments on Google+, or comment when you post something on Google+.
- You will be removed from friend of friend circles. He will also not be able to add you to circles.
- If the person you blocked is the owner or moderator of the community you joined, they will still be able to see and edit your comments and posts.
- He will not be able to write or call you Google Hangouts. Google+ blocks affecting Hangouts may also affect Google Voice.
- You can see the people you have blocked and unblock them using Activity Log.
IMPORTANT: Blocking only works if the blocked user is signed into their Google account. For example, if a blocked user is not registered, he will be able to see your public posts. Likewise, if the user is not logged in, they will be able to see public posts.
To block a user:
ADVICE: If you don't want to see someone's posts in your Google+ feed, but you don't want to block them, you can simply unfollow them.
How to Connect with People on Google+
When you follow someone:
- They will be added to the “Subscriptions” circle. ( we'll talk more about Google+ circles below)
- They will be able to receive a notification that you have subscribed to it.
- They will be able to see that you follow them.
- They will be able to choose what you see from them.
- They will be able to see what you share and have previously shared with your “Following” circle.
- Open the profile of the person you want to follow. You can find them by name, or by clicking on their photo next to a comment or post they made.
- Click Subscribe.
To unfollow someone:
- Open the profile of the person you want to unfollow. You can find them by name, or by clicking on their photo next to a comment or post they made.
- Click on the icon Subscribe(or the name of the Circle in which he is a member).
- Deselect “Subscribe”.
- Click Ready or OK.
Other great ways to connect with people on Google+:
- Comment on posts;
- Rate posts and comments +1.
How to use circles on Google+?
You can use Google Plus Circles to control who you share posts with.
A few quick notes about Google+ Circles:
- You can add someone to your circle even if they don't follow you.
- People in your Google+ Circles can see posts you share with that circle, including posts you posted in the circle before you added them.
- This does not mean that these people will necessarily see these posts in their feed ( so don't spam by adding them to your circle using @!)
- They might receive a notification that you've added them to one of your Google+ circles.
- People you add to your circles will be able to communicate with you using Hangouts.
You can change settings, choosing whether or not to show people in your circles on your Google+ profile.
You can see the people who are in your circles by selecting People in your navigation menu.

You can add or remove someone from your circles at any time.
How to create a circle in Google Plus?
- In the navigation menu, click on the icon People.
- Click Subscriptions.
- Click Create a circle.
- Enter your circle's name, then click Create.
How to add or remove someone from a circle on Google Plus?
When you follow someone, they are placed in your “Following” circle by default.
To add someone to your “Following” circle, follow them.
To add someone to another Google+ circle:
- Open the profile of the person you want to add to another circle.
- Click the name of the circle he is in or the checkbox next to his name.
- Use the menu to add it to another circle.
- Click Ready.
To remove someone from your Google Plus circle:
- Open the profile of the person you want to remove from your circle.
- Click on the name of the circle it belongs to.
- In the menu that appears, uncheck the circle to remove them from it.
- Click Ready.
How to see your circles on Google Plus:
you can use Circles to see posts from certain circles.
Your Google+ Circles are disabled by default. They can be included in the menu Settings: go to Settings => Additional settings => Show circles in navigation menu.
Once you enable Circles, you can see them in the navigation menu.
Share with all your circles or with specific circles:
On the computer:
In the Android application:
How do I get started with Google+ Collections?
With Google Plus Collections, you can create posts around a specific topic and let your followers choose what types of posts they want to see from you.
For example:
- Create separate collections for photography, recipes, sports, or other interests. Your followers can choose the collections they want to see.
- You can create a Featured List for personal photos and updates that only certain people will see.
When creating a Collection, you can:
- Select those who can see and subscribe to your Collections.
- Choose whether people who follow you will automatically subscribe to the Collection.
- See who subscribed to your Collection.
- Post in this Collection.
- Change how your Collection appears on the page.
- Delete your Collection.
When someone follows your Collections, they can:
- See your posts in this collection in your feed.
- Rate +1, comment, and share posts in your Collection.
- Unsubscribe from your Collection at any time.
When you subscribe to Collections, you can:
- View posts from this Collection in your feed.
- Choose whether to receive notifications about this Collection.
- Unsubscribe from the Collection at any time.
Google+ Collections or Communities
On Google Plus, you can subscribe to collections or join a community.
Once you create a Collection, you can change or delete it at any time.
How to see who is following your Collection?
Once you create a Google+ Collection, you can see who has followed it at any time:
How to move a post to Collection?
If you have already posted a post, you can move it to Featured.
You can only move one post at a time. Also, you can only move public posts.
How to edit or delete a Collection?
After creating a Collection, you will be able to:
- Change the name of the Collection.
- Add description.
- Select background color.
- Change cover.
You can also change the “Following” settings for your Collection, which will allow you to choose whether people who follow you automatically subscribe to that Collection.
However, you cannot change the visibility settings of your Collection after it has been created. If you share your Collection in a Circle, new people you add to that circle will also be able to see the Collection.
Editing a Collection
To change the cover or background color of a Collection:
On the computer:
On a mobile device:
To change the name and description for your Collection:
Pinning a post to the Collection
You can pin a post to your Collection by placing it at the top of the Collection page.
Removing a Collection
You can delete a Collection at any time, but you cannot undo the deletion. When deleting a Collection, all posts in this Collection will be deleted.
To delete a Collection:
How do I find and follow Google+ Collections?
When you follow someone's Collection on Google Plus, the posts they post in that Collection may appear in your feed.
Advice:You can follow Collections without following the person who created it.
To find Google+ Collections:
View Other Users' Collections
You can see other users' Collections by visiting their profile.
Some of these Collections will appear at the top of their profile. You can click More details to see all the Collections you have access to.
How do I unsubscribe from Google+ Collections?
When you unfollow a Collection, you will no longer see posts from that Collection in your feed.
To unsubscribe from Collections:
- Open the Collection you want to unfollow
- Click the icon Unsubscribe.
Getting started with Google+ Communities

In Google+ Communities, you can share information and connect with people who share your interests.
You can see posts from Communities in your feed.
By joining the community, you will be able to:
- See what other people are posting in this Community on their feed.
- Share posts in this Community with other members.
- Comment on posts in this Community.
- Unsubscribe from the Community at any time.
Once you create a Community, you can:
- Choose who can see and join your Community.
- Add other people as moderators and owners.
- Remove people from your Community.
- Edit posts and comments in your Community.
- Edit the style of your Community page.
- Delete your Community.
How to find and join a Community on Google+?
When you join a Community, you begin to see posts from that Community in your feed and you can share posts in that Community.
You can view posts on a community page even if you are not a member.
To find a Community on Google+ and join:
NOTE: If you join a “private” Community, only members will be able to see your posts in that Community. Members and people who have been invited to join a private Community can see who is currently in the Community.
If you join a public Community, anyone can see your posts in that Community and the list of members of that Community.
Unsubscribe from Google+ Community
When you leave the Community:
- You won't see regular updates from the Community in your feed.
- You will not be able to post to this Community.
- You will not be able to see the Community page
To unfollow a Community on Google+:
View Other People's Communities
Some of their Communities may appear at the top of their profile. Click More details to see all their Communities that are available for you to view.
NOTE:You may not see the Communities you choose to post on your profile on all platforms.
How many posts to show from the Community?
You can choose how many posts from the Community will appear in your feed.
To change this setting:
Receive notifications from the Google+ community
You can choose whether to receive notifications from the community you joined.
NOTE:For some large communities, you may not be able to enable the notifications feature.
How to create and edit a Community on Google+?
You can create your own Community on Google Plus based on your interests.
Other people can join and post to this Community, depending on the permissions you set.
When creating a Community, you are its owner and moderator.
To create a Community:
- In the navigation menu, click Communities.
- Click on the tab My.
- Click Create a community.
- Select a name and visibility options for your community. Click the button Ready.
After creating a Community, you will be able to:
- Change the cover photo.
- Change the name of the Community.
- Make it private.
- Add categories, links, description and location.
To edit a Community:
To delete your community:
Pinning posts in your community
You can pin a post to your community so that the post appears at the top of the community page:
Privacy Settings for Communities
When you create a community, you can set your privacy settings, but you cannot change those settings once it's created.
- Public Communities open to everyone. They appear in searches. Anyone can watch and Join (or leave a request to join) them. Anyone can see public records and a list of participants.
- Private communities allows you to share posts only with its members. Only members can see community posts and the list of members. Communities may be displayed when searching, depending on their parameters.
If you make a community private, you can choose whether it appears in search.
If you make the community private but searchable, people can request to join it.
People who are not members of a closed community can only see its name and picture.
NOTE for private Communities that are not searchable and that people cannot ask to join: if someone has a link to your community, they will still see the name and photo.
Other pages and content (including websites, blogs, and Google products such as Picasa) that link to your community will still appear in Google and other search engine results.
How to moderate a Google+ Community?
When you create a new community on Google+, you become the owner and can make other people owners or moderators.
The community owner can:
- Remove people from the community.
- Edit community information.
- Delete community.
- Make other people community members, owners, or moderators.
- Demote owners and moderators.
- Post and comment in the community
You can also become the owner of a Community that you did not create.
A Community Moderator can:
- Invite people to join the community.
- Approve requests to join the community.
- Ban or remove people from the community.
- Post posts and comments in the community.
- Downgrade and become just a member of the community.
Removing or BANing someone in the community
Deleting someone, you force them to leave the community, but they can join it again if they want.
Banning someone, you prohibit them from joining the community until you unban them.
When you delete or ban someone, the posts and comments they made in that community will not be deleted.
To remove or ban someone from a community, you must be an owner or moderator.
How to make someone a moderator or owner of a Google+ community
You can make someone a moderator or owner of your Google+ community.
Someone must be a moderator before you make them an owner:
If you no longer want to be a community owner or moderator, follow the steps above and select: Become a moderator, or Become a member.
Invite someone to join your Google Plus community
You can invite people to join the Google+ community.
Inviting someone to your community allows you to create and share posts from your community with that person:
In “private” or “request to join” communities, you can cancel existing invitations:
- Open the community where you want to uninvite.
- Click or tap a photo of your Community members
- Filter the list by the “Invited” parameter.
- Click the menu icon next to your username.
- Click Cancel invitation.
Removing posts and comments from your Community
You can moderate posts and comments made by members in your Google+ community.
When deleting a post or comment from the Community:
To moderate a post or comment in your community:
Some messages may be automatically classified as potential spam.
These messages will only appear in the community of owners and moderators, who must decide whether to accept or reject the messages.
Publishing posts on Google+
When you post on Google+, people who follow you and have the ability to view your posts will see them in their feed. The posts you share also appear on your profile.
You can choose who will see what you shared - Communities, Collections, page visitors.
Public posting on Google Plus
When you publish a post publicly on Google+, everyone can see it, even if they are not registered on the network.
Repost a post on Google Plus
To repost someone's post:
Repost a post to other social networks
Editing a post in Google Plus
You edit a post after you've already published it.
To edit:
You can also delete the post.
Google+ allows you to share geolocation information along with your photos. By default, this setting is disabled.
If you enable it, people will be able to see where the photo was taken when viewing or downloading it.
To enable geolocation:
- Open the main menu and go to Settings.
- Scroll to location Add information about the shooting location when publishing new albums
- Enable or disable this option as you wish.
Prohibition on comments and reposts of your posts
You can set restrictions on these actions.
In order to prohibit commenting and reposting of a post:
You can delete comments left under a post by clicking on the menu button next to the comment, Delete comment.
You can also choose who can leave comments on your posts using Settings menu.
Google+ and Search
Content you post publicly is searchable, even if your profile is private.
Content you share with certain people will be searchable only by them.
How to Manage Your Google+ Activity
When you post, leave a comment, or +1 something, you can delete your actions later.
You can also edit your post or delete your Google+ profile.
Delete a post or comment:
To delete a post or comment you created:
Cancel rating +1
To cancel a +1 rating on a post or comment, press the +1 button again.
Delete a post, comment, poll, vote, or +1 using the Activity Log.
If you can't find a post you posted, comments you left, or a +1, but still want to delete your activity, you can use the Activity Log.
To delete activities via Activity log:
- Select from the navigation menu Settings.
- Press Activity log.
- To see different activities like posts and ratings+1, click on the pop-up menu at the top of the screen.
- To delete an action, click X next to the event to delete.
Viewing and editing your profile
Your Google+ profile includes posts you've created, Collections you've created or joined, and Communities you've joined.
A few notes to know about your Google+ profile:
You can also add a profile photo, profile photo, and description that will be publicly visible.
To see your Google+ profile, select Profile in the navigation menu.
On your profile, people can also see more information about you by clicking the icon.
You can also edit the information About Me.
When you change your name, description, profile photo, or cover photo on Google+, those changes are reflected in your self information.
How to edit your Google+ profile?
You can edit your Google+ profile to:
- Change Collections on your profile.
- Choose whether to show Collections you follow.
- Add or change description.
- Change background and profile photo.
Please note that your own Collections will appear on your profile automatically to the people you share it with.
For example, public Collections you create will be visible to those who visit your profile.
NOTE:Profiles look different on the new Google+ and different information may appear on your old Google+ profile.
You can return to the standard interface to see and edit your old Google+ profile.
Profiles may also look different on other platforms.
To edit your profile:
- Open the navigation menu, then tap Profile.
- Click the button Edit profile.
- Make your changes, then click the button Save.
Changing your information on Google Plus
Because people can view your information using Google+, you can edit information about yourself, including your name and nickname.
NOTE:When you make changes to your information on Google+, those changes appear in other Google apps where people can see your information.
To edit information about yourself:
About Google Plus pages
You can use Google Plus Pages to create business pages, groups, or communities.
You can create and edit Google+ pages, add and remove managers by visiting the page My business on Google.
You can use the tool Google My Business to manage your +Pages.
How do I change Google+ settings?
You can change your Google+ settings by opening the navigation menu and selecting Settings.
Google+ Profile Settings
You can choose what information appears on your Google Plus profile. You can also edit your Google+ profile by going to Profile.
Some parts of your profile are only visible to people who view your profile in the classic Google+ experience.
You can also choose whether your profile will appear in search results.
Notification settings
You can turn notifications on or off based on specific actions, such as when someone tags you in a post or invites you to a Community.
NOTE:Not all devices allow you to set notifications.
Ribbon Settings
You can choose whether your news feed will be shown in a single column or multi-column when your screen size is large enough.
Some special abilities things like header navigation look best as a single column.
You can view and change these settings only using a computer.
Photo and video settings
You can choose whether or not to include the location in the photo.
You can choose whether a person can download and share photos and videos.
You can also choose whether the photos you post on Google+ will be used as background images by Google.
If you change this setting, the photos you post may be hosted on Google services such as Google Chromecast and Google Fiber. You will receive an email from Google if your photo is displayed somewhere.
Sharing options
You can change the visibility settings for your+1 activity.
Location Settings
You can use Location in Settings in Google Plus. To change go to location settings in your Google account.
Contact settings
You can choose whether the person will be added to your contacts on Android.
You can also turn on the Hints & Suggestions feature, which allows Google to use data from your device to make Google+ content recommendations for you.
You can change these settings using the Android app only.
Login to Google+ apps
You can manage applications that you have connected to your Google+ account in Page Settings.
Settings can be made using only the Android application.
General settings
You can choose who can comment on your public posts.
Activity log
Once again, you can use Page Settings to see and make changes to the Activity Log.
The Activity Log allows you to manage and delete your activities on Google+, such as comments, +1 ratings, or posts.
You can enable Social recommendations.
Circle settings
You can choose whether to show circles in your navigation menu.
Keyboard shortcuts in Google+
Another tip from Anna Hoffman(an adaptation of the article you see here):
To save time when working on Google+, you can use keyboard shortcuts. ( +CircleCountwill allow you to get to know Google Plus even better)

New version of Google+ or classic?
...Deep breath... This huge but extremely useful guide has almost come to an end. You have walked this path to the end!
It's time to mention a few differences between the old and new version of Google+.
What happened to Google+ events?
In the new Google Plus interface, you can only create new events in the Android app.
To create an event on your computer, you'll need to switch back to classic Google+.
Google+ Polls
If you're using the new iOS app or the new Google+ on your computer, you can vote in a poll, but you won't be able to create your own poll.
You'll need to return to the standard Google+ interface, or use the Android apps, to create a new poll.
Location
With the new Google Plus, you can:
- See the places where people took posted photos.
- See everyone who shares their location with you on the Map in the Android app.
Google+ Hangouts
Google+ Hangouts has been moved to its own page hangouts.google.com.
Also, for users of the Chrome browser, it was created special extension.
Conclusion
Some people say: Google Plus is useless. Some people use it very actively.
 How to set up Google Analytics goals for Facebook advertising
 Are you already using Facebook advertising? Most likely they even launched it and spent a substantial budget on it. But for some reason you are not entirely satisfied with the statistics that Facebook shows. It is simply WRONG... My advice to you: if you already have Google Analytics code installed on your site, then just set up goals in analytics and track...
 Google AdWords Remarketing: Step-by-Step Setup
 Google Adwords remarketing is something without which it is difficult to imagine modern marketing... Do you agree? For some reason, it’s not easy for many people with Google AdWords. “It doesn’t work”, “it’s too complicated” and so on... Have you heard? Remarketing or retargeting is a necessary “digital evil” in the modern Internet space. If people don’t make a purchase, don’t leave contacts in…
Show that you are a real person!! Leave a comment and tell me what you think.
The Google+ social network is a very powerful tool for promoting and interacting with website audiences. Thanks to the actively developing community and interaction of the social network with other Google services, Google+ has become a tasty morsel for many webmasters. Of particular interest here are the so-called plus pages. In this article I want to help you create and promote your + page on Google+. Shall we try?
Regardless of whether you are a beginner or an advanced user, I recommend starting your acquaintance with Google+ with my review article: “?” In this case, you will be able to immediately clarify a number of issues for yourself and avoid misunderstandings of what I will talk about in this article.
How to create a page on Google Plus?
Step 1: Section +Pages. To create a new plus page on Google+, you need to go to the section of the same name “ +Pages", where click the blue button " Create +page».
To do this, you can use the link provided or select the desired section from the drop-down list located in the upper right corner of the service pages.
Step 2: Company type. Recently, Google began to actively promote something they called “ My business - Addresses" Therefore, in the next step you will be asked to choose one of 3 types of company. For my blog I decided to choose the type " Brand».

Step 3: Title and page type. After this, you need to indicate the name and select the type of +page, as well as accept the terms of use of +pages. If you wish, you can also specify the site URL or do this later.

Step 4: Complete your profile. After creating a plus page, you will see a Google My Business greeting. By clicking the " How to start"You can get some tips, and by clicking the " Skip" - start working with it immediately.
Now you are in the section “ » profile created plus page. To switch between profiles, use the drop-down list of accounts located in the upper right corner of the service pages. But now we need to fill out the profile of the created plus page, simply by following the given instructions.

- Add a few words about the company.(Briefly about yourself) . Here, using the visual editor (you can insert a link!), You can give information about the plus page, company, etc.
Add a profile photo. I recommend taking care of this in advance and preparing a photo/picture of proportional dimensions (square), no less 250x250 pixels (recommended photo size 1000x1000 pixels).
However, if there is no proportional picture – it doesn’t matter, the excess can be cropped in the online editor. In addition, you can rotate the photo to the right or left.
As for the size, it should be taken into account that the photo can also be used by other Google services. At the same time, its size can be increased, which means we will get a blurry image.
Add a cover. Cover- this is a big photo (recommended size 2120x1192 pixel), displayed at the top of +pages. In fact, the cover also serves as something like an advertising banner displayed to the right of the profile photo plus the page.
When creating a cover, it is worth considering a number of features of its use. In particular, the central part of the cover, in a blurred form, is used as a background for the information block with the profile photo. I also noticed that when viewed by the user, the cover may be cut off ~7% edges, right and left, as well as ~1% below. There may be other features, but the main thing is not to try to calculate something down to the pixels; the cover should be as flexible as possible.
Add contact details. Here you can specify your phone, mobile, email, fax, pager, chat and address. At the same time, you can select access rights to this group of data: extended circles, for everyone (default), my circles, only me or specific users.
Add a website (if one was not specified when creating the plus page). The website URL refers to contact information and requires proof of ownership.
It is noteworthy that based on the specified URL, you will be offered a short personal URL.
Confirm the data. To do this, you need to add and confirm rights to the site in Google Webmaster Tools and/or place a LINK tag in the HEAD section of the site’s web pages with a link to the plus page, for example:
Tell us about your company in a nutshell(In a nutshell) . Here you can give a short description or indicate a slogan plus pages, companies, etc.
The profile is 100% complete and that's right!
Step 5: Links. Go to the " About Me» of your +page and pay attention to the “Links” block, where (besides the website) You can also provide additional links (I personally indicated the addresses of my blog pages). To do this, click the link " Change” in the block and gradually add the necessary links.

By the way, here you will also find the proposed option personal URL, if one will be assigned plus to the page. Read more about how this happened for me. True, now it happens much easier and faster, but still. It's a pity that now you need to add a couple of characters to your personal URL plus pages, which doesn't look as attractive as we would like, but, as we know, you don't look a gift horse in the mouth.
It's finished! You no longer need to create a profile and add articles there that will relate to business or any other work activity. Yesterday Google announced the release of pages on Google+, which should make it easier to promote your brand, website, company or business on this social network. Within the next few days, this opportunity will appear for any registered Google+ user.
As always, you need to start with creating Google+ pages for your business, and this is easy to do if you go to this page.
Available now 5 categories for business pages:
- Local business or place
- Product or brand
- Company, organization or institution
- Sports, entertainment and art (here I found a subcategory Website. I didn’t find a better category for a blog, if you have any ideas, I’m waiting for them in the comments)
- Other
Creating a Google+ Page for Business
Main. Whoever creates a page automatically becomes the page administrator and will never be able to transfer administration rights to another user. Therefore, carefully consider which Google+ account will be most convenient for administering your business page. Support for multiple administrators is not yet available, but is planned. You can create any number of pages from any Google+ profile. For example, one page for your organization, another for your brand, and a third for a product.

This is what the Google plus for business profile creation page looks like. On this page you need to enter the name, website address, select a category, enter the phone number (optional, for some categories) of your organization or business. Select what types of people the page will be available to (all Google+, 18+, 21+ users). Next, you need to agree with the rules for creating and maintaining pages (check the boxes) and click the “Create page” button.
Congratulations, your page has been created and now you will have to add some information about your business, add an avatar and a short description of your business that will be displayed under the title.
Now you can add content to your business page and invite any users from your “circles” who can add +1 to your business, brand or sports section.
You can visit the already created Dneprolab blog page, which is available at this link.
Like Facebook, you have the option to use your profile as a business page or a personal profile.
Creating a badge for a Google+ page
It's easy to create a beautiful badge for your personal page. All you have to do is follow the instructions on this page. There are now several graphic types of badges available, so anyone can choose something to suit their “taste”.
How to Find Business Pages on Google Plus
Searching for brands, products, organizations, sites, or communities on Google+ is easy. Just enter in Google search: +brand name or +product name.
For example, you can try to find the Dneprolab blog page on Google+. To do this, just type in the search: +How Google works.
I look forward to your comments and feedback about Google+ Pages.
Hello my readers! Many may need to create a website in order to organize a business or present their creativity online. You can do this yourself and completely free.
You can register, choose a template, design style and place it yourself without any help. And you can be sure that your creation will be a reason to be proud. Today we will look in detail at how to create a free website on Google.
Google provides a service for free creation of Internet projects, which is called Google Sites. Initially, you will need a registered account for this.
Detailed instructions for creating a free website on Google
Initially, go to the sites.google.com page. After this, you will need to enter your account and click on the “Login” button. On the right will be the “Create site” button. We click on it.
On the page that opens there will be tips that will help you figure out how to create a website. We will look at this process step by step.
The page that opens will provide you with a selection of templates from the collection. You need to click on the “View additional templates” link. 
You will be able to view them one by one on the right side by selecting categories in the left column.

When you have decided on a future template, click on it and you will be taken to its description. On this page there will be a link “Gadget from template directory”, following which you will be able to view the template in full size in a new browser tab. 
If you have definitely decided on the look, then click on the “Use this template” button in the upper right corner.
The next step is to choose your project name and URL. When you enter a name, the URL field will be filled in automatically, but you can make your own adjustments.

The system may throw an error. This happened to me due to a non-unique address. I corrected the URL slightly and it worked
Toolbar and site settings
After completing these steps, you will see a page for your newly created resource. If you don't like something and need to make some changes, the toolbar will become your assistant. 
With its help, you can change the font, set its size, color, add effects, load and change pictures, increase (or decrease) indents, in general, do everything related to editing.

You can undo the last action and also undo the last undo. The “Insert” button in editing mode allows you to add any object that is in the scoreboard (video, calendar, photos, slide shows, etc.).
Advantages and Limitations
Sites in Google Sites have a major difference. There is access to work on the site by several users. This means that after creation, the owner can invite other users to collaborate. You, as the owner, will have the ability to distribute access to materials.
To better familiarize yourself with all the features, I recommend visiting the control panel.

I think it would be a good idea to familiarize yourself with the restrictions:
- CSS and JavaScript are not supported,
- looks like: sites.google.com/site_name,
- There is limited customization in design and changing the color, size and style of the font.
- Anonymous comments are prohibited in general (I can’t say that this is an existing drawback, since notes left anonymously are very often of an “abnormal” nature).
- There is no RSS feed where site updates are displayed.
- Information volume limit 100 MB
I am not saying that these are disadvantages, but such limitations exist and must be taken into account.
As a conclusion, we can say that you should not limit yourself to working only in the real world. The Internet provides such an opportunity. If you are successful in real life, then demonstrate your achievements in virtual life!
Complex programs, or rather working in them, previously scared off inexperienced users. But, as you have seen, today the process of creating a professional website will not bring many difficulties. Consistently complete all the steps and that’s it – your website is ready!
If you liked my blog, then I’ll tell you a secret - it was created on the popular WordPress platform. Do you want too? If yes, then I recommend the free WordPress course.
Sincerely! Abdullin Ruslan