Do you want to paint beautiful pictures, but don’t want to spend money on materials? This is no longer a problem! Today, paints and canvases have been replaced by digital technologies, which have made painting an incredibly convenient and exciting activity.
Mouse or graphics tablet?
This choice depends on your drawing skills. If you studied at an art school or are simply confident in using a pencil and brush, then you will find it more convenient to work with a graphics tablet. If you don’t know how to draw yet, then you can easily start with a computer mouse.
As with any art form, drawing requires a certain skill. The more confident you are in using the tool, the more accurate the picture becomes. Someone creates second-rate drawings on a cool graphics tablet, while others write masterpieces using a regular computer mouse.
Choose a tool based on your capabilities and skills, and special programs will help you turn your ideas into reality.
What program to draw in?
Computers, which entered our lives not so long ago, have already become excellent helpers for us. Smart machines greatly facilitate work in all areas of human activity. Computers especially help creative individuals like artists. Surely many people know how difficult it is to paint pictures by hand. Rubbing paints, preparing the canvas - all this is a very long and tedious process, after which the desire to create is completely discouraged. And the process itself One wrong movement or stroke - and that’s it. The picture will have to be redrawn. After all, it is almost impossible to correct a mistake.
All this really interferes with the creative process. But you and I are already living in the 20th century. A long time ago, various programs for drawing on a graphics tablet and even a smartphone appeared. Now you can use your personal computer as a canvas. But to create on your gadget, you need a special program for graphic drawing. And sometimes finding a good application is quite difficult. But this article is designed to make it easier for you. After all, we will look at the best drawing programs.
Graphic drawing
The technical process has also reached the artists. Now anyone can create a masterpiece using their gadget. However, many painters are still skeptical about graphic drawing. And in vain! After all, drawing using new technologies has many advantages. We'll talk about them.
Perhaps the first thing worth noting is the savings. Artists are forced to constantly purchase canvases, paints, and various types of brushes. And this is very expensive, because professional ones cost a lot of money. When you draw on a computer, you don't spend a penny. All you need is a mouse or graphics tablet.
Another advantage is huge functionality. Professional drawing programs have a lot of settings. You can change the sensitivity of the brush, pencil, its transparency, etc. Using all these settings, you can create a real masterpiece.
Graphic tablets or computer mouse?

Well, we talked about the advantages of drawing using a PC. Perhaps now it’s worth discussing the basic tools for creating virtual paintings. Surely those painters who have used standard Paint at least once understand that drawing with a mouse is quite inconvenient. In order to create virtual masterpieces, precise positioning and appropriate kinetics of brush movement are required. A regular computer mouse cannot provide users with all this. Therefore, special tablets, also called digitizers, have been developed for artists and designers.
Typically, a special stylus pen is included with such a device, with which you can work with the digitizer. Essentially, the artist works with the tablet as if it were a canvas. The device connects to a PC via USB. Then the user writes his masterpiece on the tablet using a pen, and the drawing appears on the screen of his monitor online.
Can you draw with a mouse?
Many aspiring artists do not have the funds to buy a professional tablet. It is for this reason that many are interested in the question: “Is it possible to draw on a computer with a mouse?” In this part of the article we will try to answer this question.

Drawing with a computer mouse is quite possible. Moreover, you can do it very well. The main thing is talent and desire. As an example, we can cite a recently released video that took the Internet by storm. In it, a guy, using a mouse and standard Paint, was able to draw the famous portrait of Leonardo da Vinci “La Gioconda”. The program also plays a big role in drawing. You need to choose one that has extensive functionality. In addition, you need to perfectly learn how to use all the functions that the software provides you. In this article we will look at drawing programs for PCs that have the most comprehensive functionality.
There are many different applications available at the moment. Despite this, questions about which programs to choose for drawing on a graphics tablet are not decreasing. Are you interested in this too? Then this article is for you. After all, now we will look at the best programs for drawing on a graphics tablet.
Paint

Perhaps we will begin our acquaintance with drawing programs with Paint. This is a standard program that is present on devices with software from Microsoft. It has a rather meager set of functions, but even with them, with the right level of skill, you can create good drawings.
Inkscape
The program we'll look at now is Inkscape. An excellent drawing program in Russian. The main advantage of this software is its simplicity. The developers have created an intuitive interface that even a child can understand. On the left panel you can see the full panel (brushes, pens, pencils, etc.), on the top panel there are parameters for tools, and at the bottom there is a palette. Everything is indicated by standard icons that everyone can understand. But the fact that a program has an easy-to-learn interface does not mean that it is intended for beginners. Inkscape has a lot of settings. It will take quite a lot of time to figure it out.
Many people are looking for free drawing programs. Inkscape is one of them. This program is used by both experienced and beginning artists. Inkscape uses the universal SVG format. Thanks to it, you can create illustrations and even animations without any problems.
Is this software suitable for beginners? There are tons of tutorials on Inkscape. Therefore, novice artists and animators do not have to master the program on their own.
Gimp

Gimp is one of the most powerful programs. The program has enormous functionality. In addition to drawing, you can use it to edit photos, cut layouts for websites, etc. Perhaps the main feature of the program is support not only for a graphics tablet, but also for other, less popular input devices. Another interesting feature is support for homemade plugins. If you have programming skills, this feature will make your work much easier.
Livebrush
Livebrush is an excellent drawing program that is based on an engine called Adobe AIR. This fact can scare off many, because software written on this engine is famous for its instability. But don't worry. Livebrush functions very smoothly, and even when RAM consumption is exceeded, the program runs without lags or crashes.
As for the design, the program pleasantly surprises with its interface and menu. Not only do they look cute, but they also inspire creativity. For example, the canvas has a fairly realistic shade, and the brush exactly repeats the ink painting technique.

As for functionality, Livebrush has quite a lot of different settings that will allow you to create your own unique style. In addition, the program allows you to work with both vector and C. In order to switch between these two modes, you must press the corresponding key, which can be found on the top toolbar.
One of the downsides is the lack of customization. You won't be able to customize it to suit your whims. For example, the toolbar is always on the right side, and, unfortunately, you won’t be able to change this.
Graffiti Studio
Quite a specific and highly focused program. As the name suggests, Graffiti Studio is an editor in which you can create your own graffiti. One of the interesting features is the ability to select a background. For example, you have the opportunity to leave your masterpiece on a wall, carriage, bus, etc. We are also pleased with the extensive range of colors (there are more than a hundred of them in the editor). In addition, Graffiti Studio has a lot of settings. You can create drips, apply different markers, change the distance from the surface, etc. We can say that Graffiti Studio is a real writer simulator.
MyPaint
Need a graphic drawing program that is suitable for beginners? MyPaint is the best choice. A simple and intuitive interface, coupled with an unlimited canvas size, gives enormous scope for wild imagination. A huge set of brushes will allow you to paint in almost any manner. Using the create your own brush feature, you can discover a new, unique style. Among other things, MyPaint supports hotkeys, the use of which will greatly facilitate the work on your work. You can configure them at your discretion in a special menu.
Corel Painter

And since we have touched on programs for beginners, it would be unfair to remain silent about software for professionals. Corel Painter is the best graphic drawing program available at the moment. The application was developed by the well-known company Corel specifically for professional designers and artists. Corel Painter has immense functionality in its arsenal, which you will probably spend more than one month learning. Already on your first visit, about 30 brushes will be available to you. For each of them, you can choose up to 20 different types of fiber arrangement. In addition, the program contains so-called texture brushes of foliage, metal, asphalt, etc. The palette deserves special attention. Corel Painter has a huge number of colors. What is characteristic is that each color on the computer looks the same as it would look in real life. Since the program provides many features, a huge manual has been written for it, which is already built into the software. In it, the creators talk in detail about each function and its application. This guide is so large that the creators did not dare to localize it for the Russian segment. That is, Corel Painter is not Russified. And this is a huge minus. Another drawback of the program is the price. In order to take advantage of this offer, you will have to fork out and give the developers about $380. But it is worth noting that the price is completely justified. In this program, with skill, you can create real masterpieces.
MAXON Bodypaint 3D
MAXON Bodypaint 3D is an excellent 3D painting program. Using this software, you can easily create a high-quality texture or three-dimensional sculpture. MAXON has many different tools that will allow you to transform standard objects into real, highly detailed masterpieces.
Using this proposal, you can create professional textures for video games. But it is worth noting that 3D drawing is a very labor-intensive process. It will take a lot of time to learn how to draw three-dimensional sculptures.
ArtFlow
Where can I get high-quality drawing programs for Android? Sometimes inspiration finds a painter in the most unpredictable places. Sometimes, during a boring couple, a muse may come to you. But what to do if you don’t have a graphics tablet at hand? You must use your smartphone. But in order to draw using your phone, you need special drawing programs for Android.
The title of the best graphics program for mobile devices can be safely assigned to the brainchild of Artflow Studio - the ArtFlow application. This is an amazing mobile program that is not inferior in capabilities and functionality to its PC counterparts. A huge number of tools, a lot of settings and many colors. Drawing with this application is a pleasure. In addition, I am glad that ArtFlow is distributed absolutely free of charge. Anyone can download the program from the Play Market.
Any computer, and to be more precise, any Windows, has a certain number of “built-in” programs. They were added to the system initially and are called “Standard”. Among them there is a special drawing program called Paint.
Paint is a free computer drawing program that comes natively with Windows.
Paint's capabilities are very limited, but despite this, you can create almost masterpieces in it. It all depends on desire and talent.
How to open Paint
To open a drawing program on your computer, click the Start button in the lower left corner of the screen.
In the list that opens, click on “All programs” (Programs).
A fairly large list will appear. Select "Standards".
Finally, open the Paint program.
What does Paint look like?
There are two versions of Paint. By and large, they differ only in design.
This is what the 2003 version looks like:

And this is the modern version (2007-2016):

Also, on many computers, instead of Paint, a similar program called Paint.net is installed. She looks like this:

How to draw in Paint
Let's try to draw something. Left-click on the drawing tool. For example, on a brush.
Earlier I wrote that various actions on a computer are performed by using the corresponding programs. So you already know that text is written in a program - a text editor, the simplest of which is called Notepad. You can even draw on a computer using a program - a graphic editor. A text document with a name is a text file. Similarly, a graphic document, such as a photograph, drawing or drawing, is a graphic file.
Work with this type of documents is carried out in graphic editor.
There are different graphic editors, just like text editors. One of the well-known programs is a graphic editor Photoshop with great potential. This program is paid, again far from cheap, sometimes it can be installed on a computer when you purchase it and, of course, is included in the price. There are other free graphic editors that are not inferior in capabilities to the Photoshop editor.
The simplest program - a graphic editor, supplied with the Windows operating system and installed on your computer, is called Paint. For all its simplicity graphic editor Paint knows how to do many useful, interesting and beautiful things. Having mastered this editor, you will later be able to easily use other “cooler” graphic editors.
Using a graphic editor Paint you can view photos, copy them, cut out part of the photo, inscribe, and also create your own multi-colored drawing or a painting (if you have artistic abilities), design a personalized greeting card, draw a garden plan, etc.
Place the cursor on the "Start" button in the lower left corner of the monitor screen, move the cursor higher until the inscription "All programs", the inscription will be highlighted in blue.
A column with a list of programs will appear on the right. Move the cursor to the right in this column and select the inscription “Standard” from the list; the inscription will be highlighted in blue.
Another column with a list will appear on the right.
Move the cursor to the right in this column and select the inscription " Paint", the inscription will be highlighted in blue. Click on this inscription.
Attention!
This tutorial was previously written for a previous version of the Paint program included with the Windows XP operating system. Currently, the Windows 10 operating system includes a new version of the Paint graphics editor. The interface (appearance) of the editor has changed, the layout of the panels and some inscriptions have changed. The principle of operation of the program remains the same.
I will show some changes for Windows 10 here in red text, accompanied by new pictures. Read everything else from the previous text.
A window will open, at the top of which there is the inscription “Unnamed - Paint”. In order to expand this window to full screen, select “View” in the top line, select “Zoom” in the drop-down menu, and click “Large”. A large white field appeared in front of us - a space for work. When you zoomed in, not the entire field fit on the screen; scroll engines appeared at the bottom and right. By clicking on them with the left button and holding, you can drag the sliders one to the right, the other down to view the entire image. If this seems inconvenient to you, return the previous scale.

A window will open, at the top of which there is the inscription “Untitled – Paint”. In order to expand this window to full screen, select “View” in the top line, select “Zoom” in the drop-down menu, and click “Enlarge”.
When you zoomed in, not the entire field fit on the screen; scroll engines appeared at the bottom and right. By clicking on them with the left button and holding, you can drag the sliders one to the right, the other down to view the entire image. If this seems inconvenient to you, return the previous scale.
Next, click “Home”.

In the upper left corner you see toolbar, and at the bottom left is a color palette. Your cursor on the white field has taken the shape of a pencil, and the button with the image of a pencil is pressed on the toolbar.
Select any color from the palette by clicking the mouse and move the cursor across the field. The pencil will draw a line with the selected color.

A color palette appeared at the top right, the “Tools” panel appeared at the top left, and the cursor took the shape of a cross.
Click on the pencil in “Tools”.
Select any color from the palette by clicking the mouse and move the cursor across the field. The pencil will draw a line with the selected color.
Choose a brush instead of a pencil, change the color from the palette.

Select a brush instead of a pencil, change the color from the palette, select the brush size at the bottom of the toolbar (try different ones), move the brush across the field.

Below the pencil there is a button with a spray icon. Click on it and change the color. Briefly click on the white field, another time click and hold longer.
Depending on the duration, the spray will be less or more filled. The spot size is also selectable at the bottom of the toolbar.

Click on the arrow in the “Brushes” tool, a panel with different options will open, one of them is “Sprayer”.
Briefly click on the white field, another time click and hold longer.
Depending on the duration, the spray will be less or more filled.

If you select one of the lines in the Thickness panel, it will determine the size of the spray spot.
The thickness of the brush is also selected.
In the "Shapes" panel, select the "Line", "Rectangle" buttons, at the bottom of the toolbar, set the line thickness in the "Thickness" panel. To draw a line, place the cursor, click and, without releasing, drag further. To view an enlarged picture, click on the magnifying glass on the toolbar and click on the image. At the top of the toolbar there is an "Eraser" button, click on it, then drag along the drawn lines to erase them. You can also select the eraser size in the Weight panel by selecting the line thickness.
To draw a rectangle, place the cursor, click and, without releasing, drag along the diagonal of the rectangle. Using the "Ellipse" button you can draw both an ellipse and a circle, practice.
There is also a "Rectangle with rounded corners" button. When you hover over the buttons, read the tooltips. The polygon is drawn like this. Click the Polygon button. Place the cursor on the field, click and, without releasing, drag to the next corner of the future polygon, release, click again in the same place and drag to another corner, etc.
The resulting closed polygon (any closed contour) can be filled inside with color. Click on the Fill paint can in the toolbar, having previously selected a color, and click inside the outline.
There is also a "Curve" button. Select it. Place the cursor, click and, without releasing, drag, for example, vertically from top to bottom, release, you get a vertical straight line. Move the cursor to the line, for example, in the middle, click and, without releasing, drag, for example, to the left. Let go, you get a concave blue line.

It's time to save our experimental drawing. Click "File, Save As", double click open the "My Documents" folder, there is a "My Pictures" folder in it, open it.
Place the cursor in the "File name" line and enter the name, for example, "Figure_1", do not put quotation marks, do not put a space, instead of a space put an underscore (at the top of the keyboard while simultaneously pressing the Shift key with your left hand) or a dash.
Click "Save". The file name “figure_1.bmp” will appear at the top above the white work field; the computer has added a dot and the extension “bmp”, which is used for this picture file in this graphic editor.
To view an enlarged picture, click on the magnifying glass on the toolbar and at the bottom of the panel, click on the desired magnification scale. At the top of the toolbar there is an "Eraser" button, click on it, then drag along the drawn lines to erase them. You can also select the eraser size at the bottom of the panel. After you have erased something, click “Edit, Undo” in the top line, everything will appear again. Thus the program allows you to undo the last three actions.
You can delete everything drawn in another way. Click Edit, Select All, then click "Del" key on the keyboard. Try it, then return the drawing using the "Edit, Undo" method. Click “Edit, Select All” again, the cursor changes to a cross. Place a cross on the picture, press the left mouse button and, without releasing it, drag the entire picture to the free field. To remove the selection (the dotted line around the picture), click on the free field outside the dotted line.

After you have erased something, click the “Undo” arrow in the top line, everything will appear again. Thus, the program allows you to undo the last three actions.

You can delete everything drawn in another way. In the top line, open the “Select” arrow and select “Select All”.

You can return the drawing using the “Return” arrow.

To delete one of the shapes, open the “Select” button at the top and select “Rectangular Area”.
To delete one of the shapes, click the “Selection” rectangle on the toolbar, place the cursor in the upper left corner above the shape and drag it to the lower right corner, release. The figure is highlighted with a dotted line, press the "Del" key. Undo the last two actions: deleting and moving the picture. Save the document: "File, Save".
Now click the "View, View Picture" button. To return to the previous state, left-click on the picture field.


It's time to save our experimental drawing. Click "File, Save As". In the previous version it was possible to select only the BMP format. In the new version of the Paint editor, other saving formats have appeared, with other extensions. You can use any of them, there are some differences that are not significant for you. The most commonly used JPEG format, providing a small file size.

Windows 10 doesn't have the same My Pictures folder, so click Pictures and create a new Pictures folder, double-click it and save the picture.
If you have artistic abilities and skills, you can draw a portrait of yourself, or an animal, or a flower, and then use it as an avatar, for example in a real-time communication program. To create your own avatar (if you don’t have a photo on your computer), you can draw some geometric pattern or symbol.

Select your pattern using a rectangular selection, click "Edit, Copy to File", your "My Pictures" folder will open, give the file a name, for example "avatar_1", click "Save".
The system will add a dot and the letters "bmp" to the name. You already know that these letters are called extensions and are used to help the computer understand which program should open a given file. The "bmp" extension corresponds to the Paint graphics editor.
The file "avatar_1.bmp" is in the folder. To see how it turned out, click "File, Open", click on the avatar image, then "Open". Read how to insert an avatar in lesson No. 10.

Select your pattern using a rectangular selection, click on the “Crop” button at the top, then: File, Save As, Image in JPG format, your “Pictures” folder will open, give the file a name, for example “avatar_1”, click “Save”. The system will add a dot and the letters "jpg" to the name.
If you want to draw a picture or draw a sketch of the layout of your garden plot, but in the process of work you are afraid that you will spoil everything that has already been drawn, I recommend that from time to time you save intermediate versions of the work under different names, for example, “plan_1, plan_2, plan_3” etc. The final result of the site plan can be called "plan_done", and after reviewing, when you are sure that the sketch is complete and correct, delete all intermediate options.
To delete an unnecessary intermediate file, go to the “My Documents, My Pictures” folder, select the file, click on it, then press the “Del” key.
Greetings to all!
If earlier, to draw a picture, you needed a brush, an easel, paints, etc., but now you can create without leaving the computer! Moreover, I would like to note that paintings created in some editor on a computer also cause great delight (as if it were a painting on canvas)!
I will add that many people mistakenly believe that drawing a picture on a computer is easier than on canvas. Moving your cursor (or even drawing with a graphics tablet) is no easier or faster!
Actually, this article is dedicated to tools - to draw a picture, you need special drawing programs (note: graphic editors). These will be discussed below (by the way, I’ll add that I chose free programs that support all popular Windows: 7, 8, 10 (32|64 bits)) . So...
By the way!I have another article on drawing on my blog. There is a special sites that allow you to create paintings online, meet other artists, and find common ideas. For more information, see this article:
List of the best programs. Let's start drawing?
Before moving on to the programs, I would like to dwell on one important issue - the type of computer graphics. In general, there are two main types - vector and raster graphics.
Raster drawing is a canvas on which there are many multi-colored dots (pixels). Together, all these points look to the human eye like some kind of picture (or photo).
Vector drawing consists of entities: line, segment, square, ellipse, etc., which are all interconnected. All these entities also form a wide variety of pictures.
The main advantage of a vector drawing over a raster one is the ability to transform it in any way (for example, enlarge it) without losing quality. The computer, in fact, only needs to recalculate your picture according to the mat. formulas.
Raster graphics are convenient for creating high-quality photos and digital drawings. The most popular raster image formats are JPEG and PNG. It is raster graphics that are most popular in our time (and that is why in my article the main focus is on programs for working with it).
Vector editors in the article: Gravit, DrawPlus, Inkscape.
Raster editors in the article: Paint, Gimp, ArtWeaver and others...
Paint
Raster editor
Basic program in Windows
How to start: find it in the START menu, or press the Win+R buttons, enter the mspaint command in the open line and press Enter.

A very simple graphic editor, designed not even for drawing, but for easily editing pictures (add an inscription, an arrow, erase something, cut out one piece of the picture and paste it into another, save the screenshot taken, etc.).
Professionally, of course, you can hardly draw anything in Paint, but if we are talking about some very simple drawings, then the program can be used. At least, if you are just at the very beginning of your journey, then why not try? ☺
Gimp
Raster editor (partly vector)

The GNU Image Manipulation Program (or GIMP for short) is a very powerful, free and multi-purpose graphics editor. This editor is very multifunctional: it can be used for drawing, or as a program for retouching digital photos, as a program for processing a package of pictures and publishing them (+ converting one format to another).
In addition, there are very interesting opportunities for creating step-by-step commands (scripts) that will automate routine tasks (and the scripts can be truly complex)!
Main advantages:
- drawing pictures and posters;
- support for graphics tablets (Wacom, Genius, etc.);
- draw web designs for sites, edit ready-made layouts from Photoshop;
- you can refresh your old photos, make them more juicy and vibrant;
- or poster;
- remove unnecessary elements from photos (a bad photo can become a good one!);
- a huge collection of plugins for GIMP will allow you to solve a wide variety of problems;
- The program supports Windows, Mac, Linux operating systems.
ArtWeaver
Raster editor (some analogue of Photoshop)

This program replicates many of the tools of such a popular editor as Adobe Photoshop. To edit ready-made pictures and draw new ones, there are a bunch of ready-made brushes of all types and sizes, different modes, pencil imitation, ink pen, oil brush, etc.
Main advantages:
- support for all popular graphic formats: GIF, JPEG, PCX, TGA, TIFF, PNG (including PSD and AWD);
- a huge number of tools for editing pictures: gradients, selections, filling, etc.;
- plugin support;
- availability of convenient drawing tools: brushes, pencils, etc.;
- graphics tablet support (BIG plus for those who like to draw);
- many different filters: spot, blur, mosaic, mask, etc.;
- working with text layers;
- the ability to sequentially cancel your actions.
- support for all popular versions of Windows.
MyPaint
Raster editor

MyPaint - painted portrait of a girl
A popular raster graphics editor designed more for digital artists (those who like to draw). It is an unlimited canvas (sheet) and a relatively simple interface on GTK+, without distracting the artist from the creative process - drawing.
Unlike Gimp, MyPaint has much less graph functionality. editor, but for your attention a huge dimensionless canvas; a large number of brushes, for a variety of tasks and for different functions (there are a lot of brushes, see the screenshot above).
MyPaint is a tool for painting with brushes on your PC screen almost as if you were doing it on a real canvas. In addition to brushes, there are: crayons, charcoal, pencils, etc. It's hard to resist if you have a craving for drawing...
Main features:
- the program is specifically designed for drawing, so it has fewer options for editing existing pictures (i.e., there are no functions such as selection, scaling, etc.);
- a huge set of brushes that you can customize for yourself: create and change groups, blur, mix colors, etc.;
- the program supports graphics tablet;
- the boundless canvas is very convenient in the drawing process - nothing is holding you back while creating;
- support for layers: copying, pasting, adjusting transparency, etc.;
- Windows, Mac OS, Linux supported.
SmoothDraw
Raster

A free program for painting and those who like to draw by hand on a computer. The program's interface is very simple, designed so that any artist who has just started can immediately start creating without wasting time studying.
I would like to immediately note that the program has a lot of brushes (pen, brush, airbrush, pencil, etc.), there are tools for retouching, working with layers, you can change the brightness, contrast, colors of pictures, add some effects .
Program features:
- many types of brushes for drawing: pencil, chalk, pen, airbrush, brush, spray, etc.;
- works with tablet PCs, supports graphics tablets;
- works with the following image formats: PNG, BMP, JPEG, JPG, TGA, JIF, GIF and TIFF;
- there are tools for photo retouching;
- working with layers;
- possibility of color correction;
- Compatible with Windows 7, 8, 10.
Note! For SmoothDraw to work, you must have at least NET Framework version v2.0 on Windows.
Paint.NET
Raster
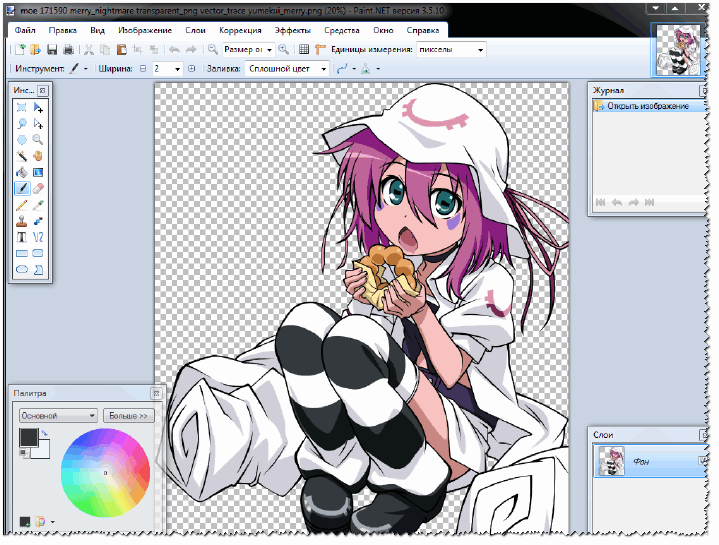
Paint.NET is a free picture and photo editor for Windows. The main difference from other programs is that it uses an intuitive and innovative interface with support for layers, a dimensionless canvas, special effects, useful and powerful editing tools (analogues of which are only available in paid products).
Active and growing online support will help in solving non-standard problems. In addition, quite a lot of instructions have been written for the program, additional ones. plugins to expand capabilities.
Peculiarities:
- free to distribute and use;
- user-friendly interface (somewhat similar to Photoshop);
- you can work with many documents at the same time;
- support for working with layers;
- a large number of instructions;
- the program is optimized to work with 2 and 4 core modern processors;
- Supported by all popular Windows: XP, 7, 8, 10.
Livebrush
Raster

Livebrush(translated from English as “live brush”) is a powerful graphic editor that allows you to paint with brushes. Moreover, I would like to immediately note that the “drawing tool” is not a simple one, with its help you can create quite interesting pictures, decorate the art with beautiful strokes and lines, etc.
As you work, you can select and adjust the brush so that as you move it, the line under the brush will change its thickness, color, transparency, tip rotation, depending on your mouse movement speed, pressing speed, etc.
By the way, those who have a graphics tablet will be able to fully experience the benefits of Livebrush, because it also understands the force of pressure and its inclination.
The program's set includes many brushes of different shapes: from simple lines to patterned Gothic ornaments. By the way, you can correct any pattern yourself by switching to editing with a pencil.
In addition, you can draw the pattern yourself and save it as a template. You can import ready-made sets of brushes, projects, and decorations into the program. By the way, they can be found in huge quantities on the official forum of the program.
In general, my verdict is that the program is very convenient, interesting, and deserves the attention of all drawing lovers!
Inkscape
Vector editor (one of the few)
Free analogues: Gravit, DrawPlus
Paid analogues: Corel DRAW and Adobe Illustrator

Inkscape is a free vector editor, one of the few that can partially replace such monsters as Corel Draw and Adobe Illustrator. The application has a fairly standard interface: color palette, menu, tools. The program supports all major graphic formats: SVG, PDF, AI, PS, EPS, CorelDRAW.
By the way, Inkscape also has tools from the raster editor - for example, it supports various types of blending. In addition to drawing some geometric shapes, the program supports extensive work with text: you can write text along curved lines. It looks very cool and unusual.
The application has a fairly large number of filters, extensions, etc. All this is available at the office. program website.
Gravit
Vector editor (online version)

Gravit- quite an interesting vector editor. Of course, it cannot replace Adobe Illustrator, but it can compete with the previous program (Inkscape).
The tools include all the most basic things: pens, lines, intersection and cutting of shapes from each other, alignment, layers, fonts, etc. Works can be exported to SVG and several raster formats. You can also open works made in Adobe Illustrator in the program.
What's somewhat surprising is that Gravit looks like a real program while running in a browser window, without using Flash. Among the main shortcomings I would highlight the lack of Russian language.
By the way, in Gravit the choice of canvas is quite interesting: you can choose standard formats of sheets, business cards, postcards, and create covers of popular social networks, phone screens and other gadgets.
Overall, an interesting editor that deserves attention.
DrawPlus
Vector

A very flexible and powerful graphic editor that allows its users to create high-quality illustrations. This program will allow you to fully explore your drawing capabilities.
DrawPlus has many tools that will allow you to easily and quickly create a variety of shapes, strokes, and lines. Each of the elements can be combined with others and gradually the whole complex will become a rather complex, but beautiful illustration.
By the way, DrawPlus has a 3D module - it will allow you to turn your creativity into real 3D design elements. You can apply a wide variety of effects when creating logos, isometric projections, and flowcharts.
You can import a huge number of formats into the program: PDF, AI, SVG, SVGZ, EPS, PS, SMF, etc. The proprietary format for projects is DPP.
Graffiti Studio
Website: http://www.vandalsquad.com
Raster graphics

One of the best programs for drawing graffiti, it looks as realistic as possible!
To start drawing: you need to choose a piece of canvas (carriage, walls, bus), and, in fact, start creating (there are just heaps of ready-made options to choose from!). The artist has a large palette of colors (more than 100 pieces), several types of caps (skinny, regular and fat), and a marker. The distance to the surface is changed manually, it is possible to make drips. In general, for fans of such graphics there is a huge scope!
Those who don’t believe that you can create real masterpieces in the program, I recommend taking a look at the official website and seeing the best works - your view will change a lot!
PixBuilder Studio
Raster editor

A powerful program for processing and editing graphic images and photographs. In addition to editing, it is quite possible to draw and create (although there are fewer tools for this than in previous similar programs).
PixBuilder Studio has quite interesting tools that allow you to finely work with color, brightness, contrast, and layers. In addition, there are built-in effects (for example, dithering (when processing digital signals, it is the mixing of pseudo-random noise with a specially selected spectrum into the primary signal) ), blur, sharpening, etc.
Peculiarities:
- support for popular raster formats: BMP, PNG, JPG, GIF, TIFF, etc.;
- there is the opportunity and tools for drawing (though very limited);
- Great opportunities for editing finished photos and pictures;
- ability to work with layers;
- professional work with color: adjusting balance, brightness, contrast, etc.;
- setting up hot keys;
- the presence of ready-made effects (you just need to apply them);
- preview (to evaluate the result);
- support for popular Windows OS: 7, 8, 10.
Krita
Raster editor

An excellent and convenient raster graphics editor for artists (by the way, at the time of writing this review, the program is free even for commercial use). Krita runs on both Windows and Linux.
As for the most important thing: there is a good brush motion stabilizer, layers, masks, dynamic brushes, animation, a large number of blending modes, paper and pastel imitation, “infinite” canvas, etc.
By the way, there is even a portable version of the program that can be run from a regular flash drive on any PC. The program has also been translated into Russian.
PS: the article will be updated...
Thank you in advance for tips and advice in the comments!