
In this article, I will talk about running programs for Windows (*. .exe files) on phones and tablets running operating system Android. This is not about flashing another operating system instead of the native Androyd, but about emulators that work in the Android environment. There are 3 emulators, we read about the advantages and disadvantages of each below.
Method number 1 - QEMU(fastest but a bit buggy)
Thanks to this emulator, you can run on your device with android windows 95 or Windows 98. Before talking about the advantages and disadvantages of this emulator, I suggest you install it yourself and take a look at the work. I'm sure the sight of Windows loading on your smartphone will surprise not only you, but also your friends :)
So let's get started:
1 Install SDLapp.apk (QEMU for Android v.0.13; ~1.35 Mb).
2 Download SDL.zip ( bios firmware, video cards, etc.) and unpack the SDL folder to the root of the sdcard.
3 Download the *.img image of the operating system ( | ), drop the "C.img" file from the archive into the "SDL" folder on the sdcard.
4 Run the program installed at the first stage and rejoice. Well, or upset, not everyone is lucky.
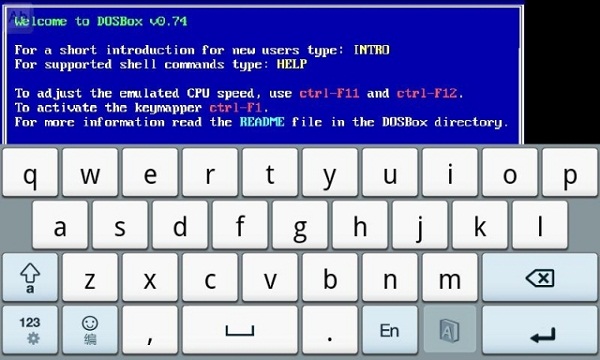
To begin with, I recommend downloading exactly Windows 95, it is more prepared to work on a touch screen. It's already built in screen keyboard, the volume keys are set to simulate right and left mouse clicks. In both operating systems, the "Menu" key simulates pressing "Enter", and the "Back" key simulates "Esc". The touchscreen works like a touchpad in laptops, i.e. The cursor will not be where you tap, but where you drag it. Double clicks are not always obtained, it is easier to select the icon and press "Enter" (the "Menu" button of the phone).
What can you say about work? Windows 95 runs noticeably faster than Windows 98, about the same as on computers of its time, but most of the necessary programs do not run on it. In this port of QEMU, math coprocessor emulation does not work well. Therefore, there is an opinion that Windows XP, Windows 7 and Linux may not start. However, there is also an opposite opinion. But personally, I did not check this, limited myself to running Windows 95 and 98.
Yes, by the way, I did not say about the way to launch my programs, I am correcting myself. Many people try to increase the image size with windows. But I suggest to do it easier. To run our programs, we will create an image of the D drive and put everything we need into it.
1 Download Qemu_HDD.rar (archive with empty disk images of different sizes).
2 Download WinImage_8.10.8100.rar and use this program to upload our files to the image of the desired size. (For some reason, UltraISO does not know how to work correctly with img files)
3 Rename the image with your programs to "D.img" and drop it into the SDL folder on the phone's sdcard.
4 We write the following in sdl.conf: "/sdl -L . -m 128 -boot c -hda C.img -hdb D.img-usb -usbdevice tablet"
5 We start Windows and try to run our program from drive D.
Now for the disadvantages:
- Clicks (taps) do not work the first time.
- No network and internet support.
- No sound.
- The screen resolution is not suitable for comfortable work.
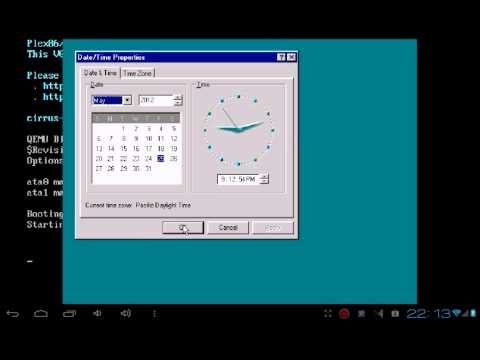
- Incorrect time flow (clock in Windows shows the wrong time).
- Support and further development of QEMU has been discontinued.
Advantages:
- Works much faster than other emulators.
Method number 2 - BOCHS(most stable but slowest)
Undoubtedly, this is the best of all the emulators presented here. It is not as buggy as QEMU, it works more stable and there are no problems with the mouse. Theoretically, it can run any operating system of the i386 family. But the emulator works slowly, so in practice, launching heavy operating systems can take up to half an hour. Although, there are lightweight distributions of everyone's favorite Windows XP, which are quite realistic to run on an android phone with average characteristics in a reasonable time.
The installation is very similar to installing QEMU:
1 Install Bochs2_5_1.apk (BOCHS for Android v.2.5.1; ~1.20 Mb).
2 Download SDL_for_BOCHS.zip (bios firmware, video cards, etc.) and unpack it into the SDL folder previously created in the sdcard root.
3 Download the *.img image of the operating system (), rename the file from the archive to "c.img" and drop it into the "SDL" folder on the sdcard. (Attention, images from QEMU do not work).
4 Run the program installed in the first step and wait.
You can make mouse clicks by pressing the volume keys, double clicking works great. The rest of the keys are the same as in QEMU: "menu" is equivalent to "enter", and the "back" key is treated as "Esc".
If you want to run your programs and games, then create a disk image and connect it as drive D. Use the method described above for QEMU. To force the emulator to use your image as the D drive, open the "bochsrc.txt" file in the "SDL" folder and remove the "#" in front of the line #ata0-slave: type=disk, path="d.img". Rename your image to "d.img" and drop it into the "SDL" folder.
There is also a simpler option, without using an image. This version BOCHS supports direct access to the phone's storage. To enable this option, add the line ata0-slave: type=disk, mode=vvfat, path=/sdcard/HDD, journal=vvfat.redolog to the file "bochsrc.txt". Where "HDD" is the folder created in the root of sdcard.
Minuses:
No network support
Runs slower than others
Pros:
- Stability and good mouse emulation
- Run most operating systems
- Sound card emulation support
- Continuous development of the program
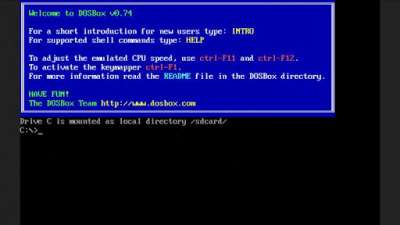
Method #3 - aDOSBox (just another option)
This emulator will be of interest primarily to fans of old DOS games. But despite the fact that it was created to run DOS, the craftsmen found a way to run Windows on it. It should be noted that it works well. On this emulator better screen, Windows took up all the space on the display, there was no black border around the edges. The mouse works a little better than in QEMU. True, if in QEMU the mouse did not always work, then in aDOSBox it sometimes accidentally "clicks" when moving.
To install, do the following steps:
1 Download and install aDosBox-v0.2.5.apk (~1.80 Mb)
2 Download config-adosbox.rar, copy the file "dosbox-0.74.conf" from the archive to the folder "sdcardapp-dataorg.hystudio.android.dosbox.dosbox" (with replacement; the folder will appear only after installing the program).
3 Download the archive with the image of Windows 98 (the same image that was for BOCHS) and upload the file "win98.img" from the archive to the root of the sdcard.
4 Launch installed program and wait patiently for a few minutes.
Conclusion.
None of the ways to run Win32 applications on android devices gives you the same experience that you would have in a full-fledged operating system. Windows system. If the speed of work and the lack of sound are not important, then you can run quite tolerably various programs without network access, play games (DOS games will work just fine). But the lack of internet connection is a huge disadvantage of emulators. For personally I needed some Windows Applications working over the Internet. For example, for Android there is no browser with authorization by user certificates (as for WebMoney Keeper Light), but on Windows any browser supports it. But it was not there, there is no access to the Internet from emulators.
I guess everyone has their own reasons for installing i386 emulators. Good luck with your experiments. I hope the material was useful at least for someone.
All of the above has been tested for samsung galaxy note.
Hello! Wandering through the pages of various sites, looking for something interesting for the phone, I came across an interesting article that explained how to run Windows OS on Android. Those. you do not change the OS, but only run the Windows emulator. There are three ways to start it, but I'm only taken aback by two ...
1 way - QEMU
So let's get started .. What we will do:
- Download and install sdlapp.apk on your phone
- Download sdl.zip and unpack the SDL folder to the root of the memory card
- Download the image of the OS (Operating System):
4. Reboot the phone
5. We launch the program from point 1. and we see that OS Windows is starting to start)))
Installing your apps:
- Download qemu_hdd.rar (empty disk images)
- Download Winimage_8.10.8100.zip and use it to copy your files into an image of the desired size
- Next, rename the image with your programs to "D.img" and drop it into the SDL folder on the memory card.
- We write the following in sdl.conf - "/sdl -L . -m 96 -boot c -hda C.img -hdb D.img -usb -usbdevice tablet"
- Starting Windows and trying to run your applications...
This method is quite simple, and there is nothing complicated ..
2 way - BOCHS
This method is very similar to the first. And he is considered the most the best way. You can run both Windows 95 and Windows xp on it... Less glitches, it works more stable and there are no problems with the mouse. But the emulator works just as slowly as QEMU. And many write that it can run Windows XP.
So, let's begin:
- Download and install Bochs2_5_1.apk
- Download SDL_for_BOCHS.zip and unpack all files from the archive into the SDL folder that you previously created in the root of the SDcard.
- Download *.img OS image - Windows 98 ( OS IMAGE FROM QEMU(FIRST METHOD) UNFORTUNATELY NOT SUITABLE)
- Rename the file from the archive to "c.img" and drop it into the SDL folder on the sdcard.
- We launch the program installed at the first stage and wait ...
If you want to run your programs or games, then you will need to create a disk image and connect it as drive D. Use the method described above for QEMU. To make your image work as drive D, open the file "bochsrc.txt" in the SDL folder and remove the # before the line #ata0-slave: type=disk, path="d.img" . Rename your image to "d.img" and drop it into the "sdl" folder
There is also a simpler option, without creating an image.
This version of BOCHS supports direct access to the phone's storage, and to activate it you need to add the following line:
ata0-slave: type=disk, mode=vvfat, path=/sdcard/HDD, journal=vvfat.redolo
You need to write it to a file "bochsrc.txt" . Where "HDD" is the folder created in the root of sdcard.
Experiment, try and write comments...
Reviews
associate professor ashot | 15.08.2012 02:28
Yes, that means. I ran Piggy on my optimus one, everything is fine, the windows xp log and the loading bar, and then .... Herak. BSOD got out, on my phone. Well, you must...
vladik dubrovin | 06/22/2012 13:05
sanchez, I'm running second now windows way 95, does not crash, but the mouse slows down and the graphics are bad. But it works, albeit slowly.
To be able to use Windows programs on devices managed by the operating system Android system, you need to install the appropriate emulators on them. This is not about flashing android to windows, but about emulators running in the Android environment. There are several emulators that allow you to run windows 95, 98 and windows xp on android. Each of them has its pros and cons.
QEMU (fastest but buggy)
This emulator allows you to windows boot 95 or windows startup 98 on android. To evaluate the work of this emulator, try installing and testing it yourself.
To install the emulator, do the following:
- Install SDLapp.apk (QEMU for Android v.0.13; ~1.35 Mb).
- Download SDL.zip (here bios firmware, different video cards, etc.) and unpack to the root sdcard.
- Download *.img operating system image (Win95 / Win98).
- The file from the "C.img" archive must be placed in the "SDL" folder on the flash drive.
- Run the program installed on the original, although it may not work for everyone.
Running Win on a QEMU emulator
First you can download exactly Windows 95, so it is more adapted to work with touch screen, and installing windows 98 on android occurs with some nuances. Win95 already has an on-screen keyboard built in, the volume buttons are configured to imitate the right or left mouse click. In both operating systems, the Menu key simulates pressing Enter, and the Back key simulates Esc. The touchscreen works like a touchpad in laptops, that is, the cursor becomes where you drag it. Doesn't always work out double clicks, it's much easier to highlight the desired icon and press "Enter" (the phone's "Menu" key).
As a result of testing, it will be noticeable that the launch of windows 95 on android is noticeably faster than Win98, about the same speed as on computers of that time, but quite a lot desired programs does not run on it. In addition, math coprocessor emulation does not function well. As a result, Win XP, Win 7 and Linux may not start.
To run your programs, you can do the following:
- Create an image of disk D and put everything you need into it.
- Download Qemu_HDD.rar (this is an archive with zero disk images of various sizes).
- Download WinImage_8.10.8100.rar. With its help, place the necessary files in the image of the desired size.
- Rename the image with the programs as "D.img" and place it in the "SDL" folder on the device's flash drive.
- Write the following form in sdl.conf: "/sdl -L . -m 128 -boot c -hda C.img -hdb D.img -usb -usbdevice tablet"
- Start Windows and try to run your program from drive D.
Emulator Disadvantages:
- Clicks (taps) do not work the first time.
- No networks and internet supported.
- Screen resolution is not acceptable for comfortable work.
- No sound.
- Incorrect time display.
- Technical support and subsequent development of QEMU has been discontinued.
Advantages:
- Works much faster than other emulators.
BOCHS (most stable but slowest)
Win on BOCHS emulator
It is considered the best of these emulators. It doesn't have QEMU's shortcomings and mouse issues and is more stable. In principle, it would be possible to run any windows version but its extremely slow work nullifies the launch of heavy operating systems. Although there are lightweight distributions that allow you to, for example, run windows xp on android devices for a reasonable period of time.
- Install Bochs2_5_1.apk (BOCHS for Android 2.5.1; size 1.20 Mb).
- Download SDL_for_BOCHS.zip (archived bios firmware, video cards, etc.).
- Unpack to the SDL folder, having previously created it in the sdcard root.
- Download *.img image of the operating system.
- Rename the file in the archive to "c.img" and place it in the "SDL" folder on the flash drive. Please note - images from the QEMU emulator do not work!
- Run the program that was originally installed.
You can click with the mouse by pressing the volume buttons, while double-clicking works fine. Other keys function as in QEMU: the Menu button is equivalent to Enter, and the Back button is analogous to Esc.
To run your programs and games, you need to create a disk image, and then use it as disk D. This can be done using the method described for QEMU. In order for the emulator to use your image as disk D, you need to open the “bochsrc.txt” file located in the “SDL” folder and remove the “#” in the line “#ata0-slave: type=disk, path=”d.img ". The created image must be renamed to "d.img" and placed in the "SDL" folder.
You can use a simpler option, without using an image. The described version of BOCHS supports direct access to the device's storage. To enable this option, add the form "ata0-slave: type=disk, mode=vvfat, path=/sdcard/HDD, journal=vvfat.redolog" to the "bochsrc.txt" file. Here "HDD" is the folder located in the root of sdcard.
Disadvantages:
- Works slowly.
- No support network.
Advantages:
- Work stability.
- Excellent mouse emulation.
- Support for sound card emulation.
- Run most OS.
- Continuous development and support of the program.
aDOSBox (another option)
The emulator will be of interest primarily to fans of old DOS games. Although it was created to run DOS, it is also possible to install windows on an android tablet, for example, using it.
aDOSBox interface
To install, follow these steps:
- Download and install aDosBox_v0.2.5.apk (size 1.80 Mb)
- Download config-adosbox.rar.
- Copy the “dosbox-0.74.conf” file from the archive with the replacement to the folder on the flash drive “/sdcard/appdata/org.hystudio.android.dosbox/.dosbox” (attention! - the folder will appear only after the program is fully installed).
- Download the archive with the Win 98 image and place the file "win98.img" in the root of the sdcard.
- Run the installed program.
Advantages:
- Good job overall.
- Windows on the screen is displayed better, without a black frame.
- The mouse functions a little better than in QEMU.
Disadvantages:
- Periodic random mouse clicks while moving.
Conclusion
None of the emulators that allow you to install windows on an android tablet will give you all the features available in a full-fledged Windows OS. But if you are not interested in the speed of work and are not afraid of the lack of sound, then you can tolerably run some programs without network access or play games. But the biggest disadvantage of emulators is the lack of internet connection.
Watching movies on android tablet e
And already caught fire by installing this OS on your tablet. In the last post it was written that adaptation is possible only for HTC EVO 3D, but this is far from the case. Below you will clearly see the confirmation of the operation of Windows XP SP3 on an Acer tablet Iconia Tab A500.
Let's start by watching a video demonstrating the plausibility of the operations described below. I want to warn you right away that you are doing everything at your own peril and risk, not me and not the administration of the resource is not responsible for the formation of your brick tablet.
https://www.youtube.com/embed/HvLWkcnGbO8
Now the installation process itself.
First we need to create (.img) a Windows image, but you can use already ready-made assemblies and skip the entire first step.
Ready Windows images:
Bringing back Windows NT4 in a new guise on a tablet! Compared to XP, this OS boots and runs just fine.
Attention test version!
No audio support.
No additional software.
IPS: 800000-1200000
RC2 coming soon.
Stage I
1. Download QEMU for PC:
2. On drive C, create a folder QEMU and unpack all the files and the downloaded archive there.
3. We launch the command editor, for this we simultaneously press the Flag + R buttons on the keyboard. Using the cd command, go to the created folder (type cd c:\QEMU and press Enter). note that this window should not be closed until the end of the entire process, because it will be needed more than once.
disk.img- Name hard drive
2000M- the size of the hard disk in megabytes (you can set any size, the main thing is that it fits Windows OS.)
5. Now you need to find any installation disk with Windows XP and create an image (.iso) and rename it to image.iso (I will not describe how to create images here, for those who are
knows how to do, they will do it themselves, for those who do not know how, there are links to ready-made images above).
6. Copy the resulting image.iso to the c:\QEMU folder
7. Now that everything is ready, we launch QEMU (for this we type the command qemu.exe -m 1024 -boot d -cdrom image.iso -hda disk.img)
Where:
-m 1024- volume random access memory, which will be available to QEMU
-boot d- indicates boot from cd-rom
-cdrom image.iso- direct installation disk
-hda disk.img- image of the created hard disk
8. Now install XP the way you do it on a PC.
The creation of the Windows image is complete.
We transfer the created disk.img from the C: \ QEMU folder to the tablet in any folder (for now).
Stage II.
Now let's set up the tablet.
Download BOCHS
Download SDL
How to install?
1. Install bochs2_5_1.apk